Integrate Visual Passcodes with OneLogin
This guide explains how to integrate Visual Passcodes IdP (VP-IdP) as an OIDC Trusted IdP in OneLogin. Keep your VP-IdP OIDC metadata handy (issuer, authorize endpoint, token endpoint, userinfo endpoint, scopes, client ID, and client secret).
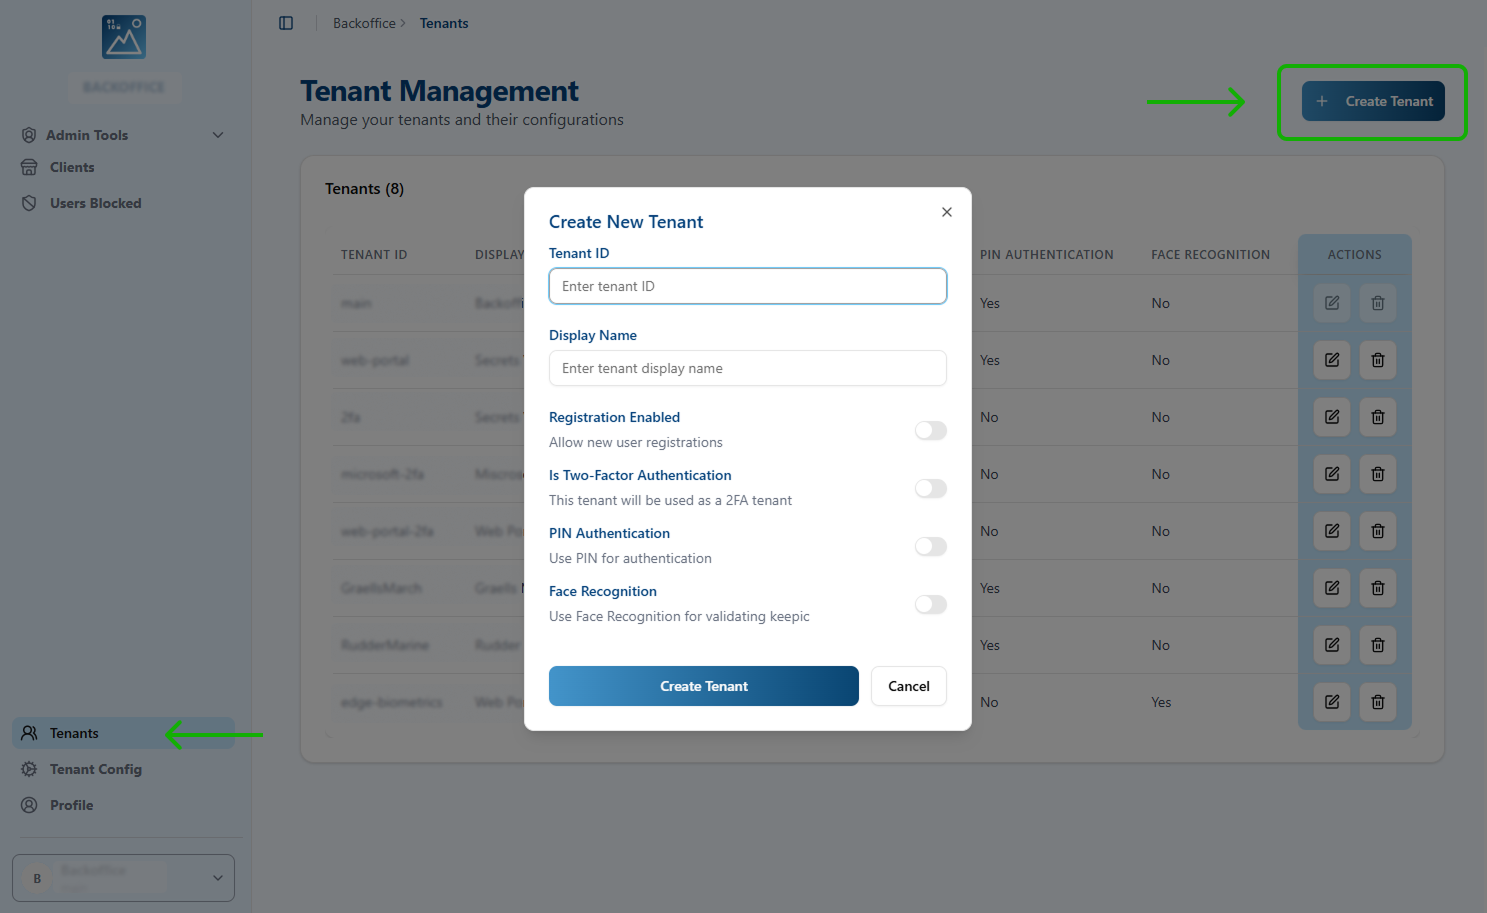
Step 1: Prepare the VP-IdP Tenant
- Log in to the VP-IdP Backoffice with global admin permissions and create a new tenant. Do not enable two-factor authentication; use image-only or image + PIN authentication.
- Select the correct tenant in the dropdown menu at the bottom of the left sidebar (verify the tenant name under the logo in the top left).
Create the OIDC Client for OneLogin
- In the Clients section, click + Add Client.
- Complete the required fields:
- Name: A readable name for the client.
- Client ID: A unique identifier without spaces.
- Redirect URI (OneLogin SSO):
https://{onelogin_domain_name}/access/idp. - Redirect URI (MFA):
https://{onelogin_domain_name}/mfa/v1/idp/auth_callback(if using MFA). - Lock: Enable this option.
- Client type:
Confidential. - Algorithm:
EdDSA. - Logo: Public URL of the OneLogin tenant logo.
- Client Base URL:
https://{onelogin_domain_name}/access/idp.
- Save the client and securely store the Client ID and Client Secret—you will need these for OneLogin configuration.
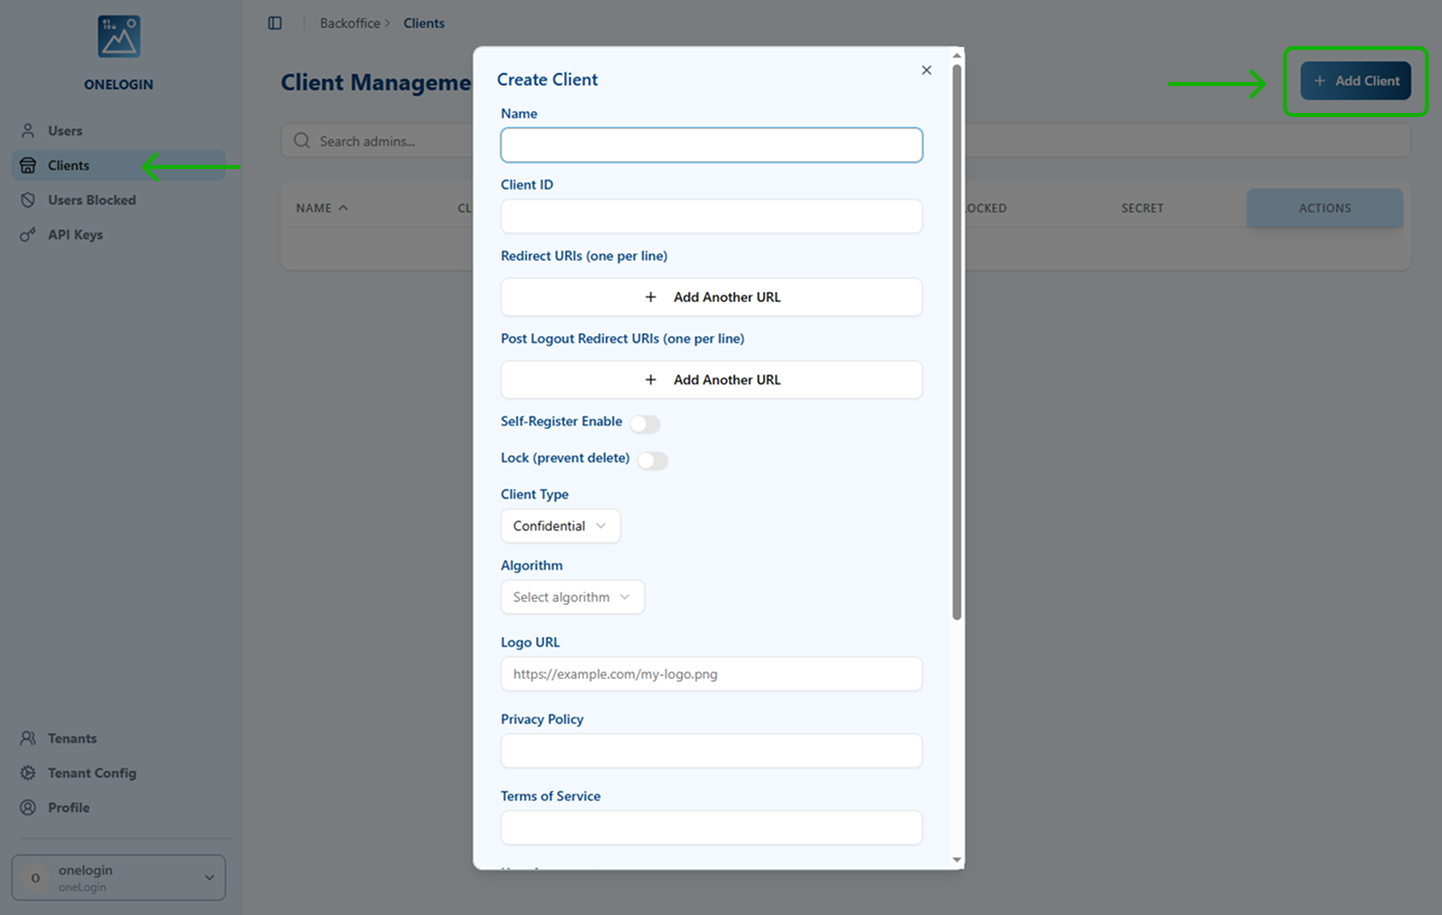
Compliance note: Add your organization's Privacy Policy, Terms of Service, and User Agreement URLs. All fields except Client ID can be edited later.
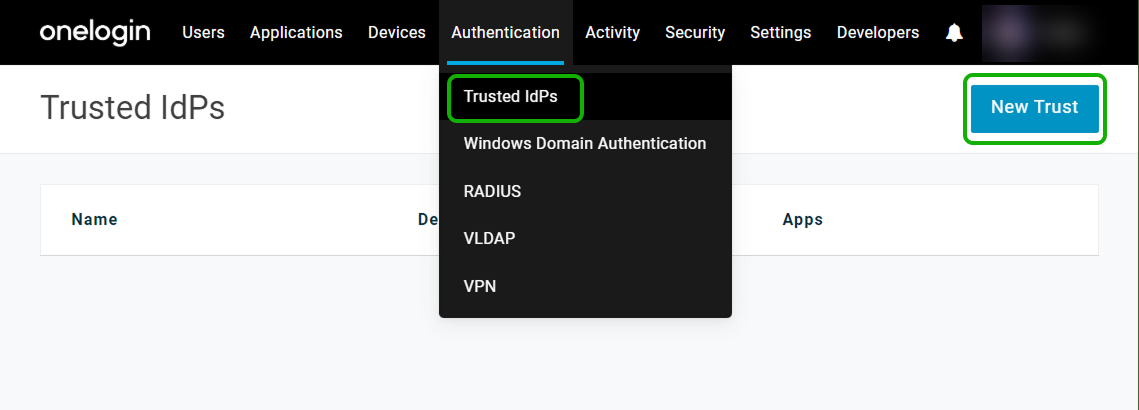
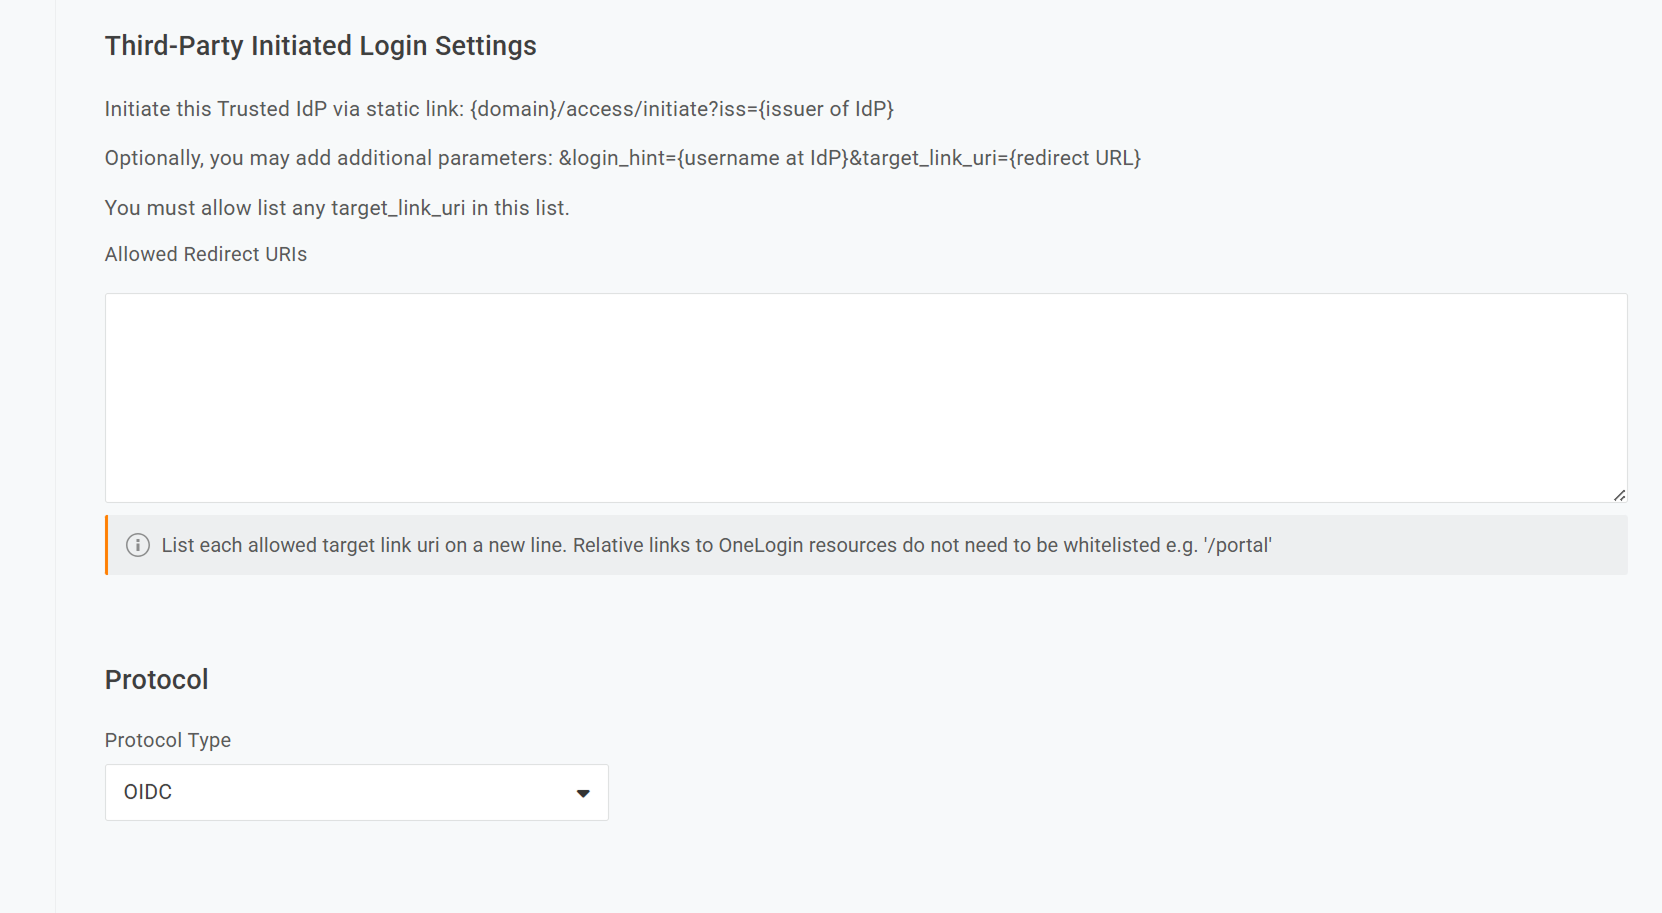
Step 2: Register VP-IdP as a Trusted IdP in OneLogin
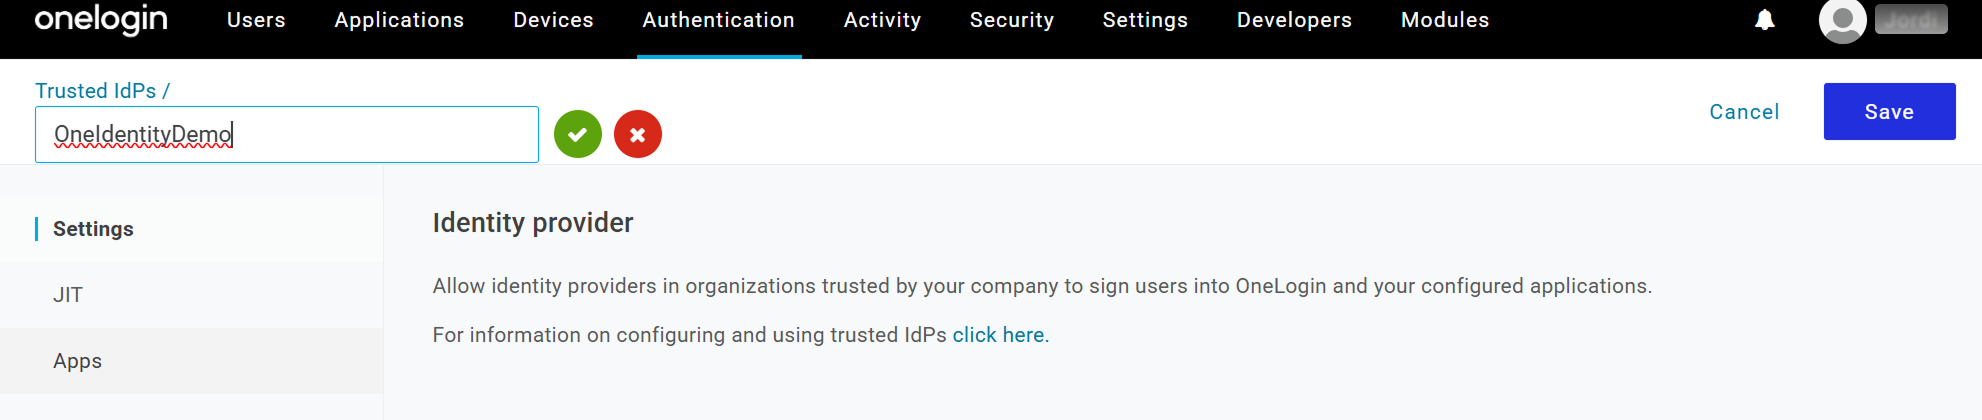
- In the OneLogin admin portal, navigate to Authentication > Trusted IdPs and click New Trust.
- In Settings, assign a clear name and select OIDC as the protocol type.
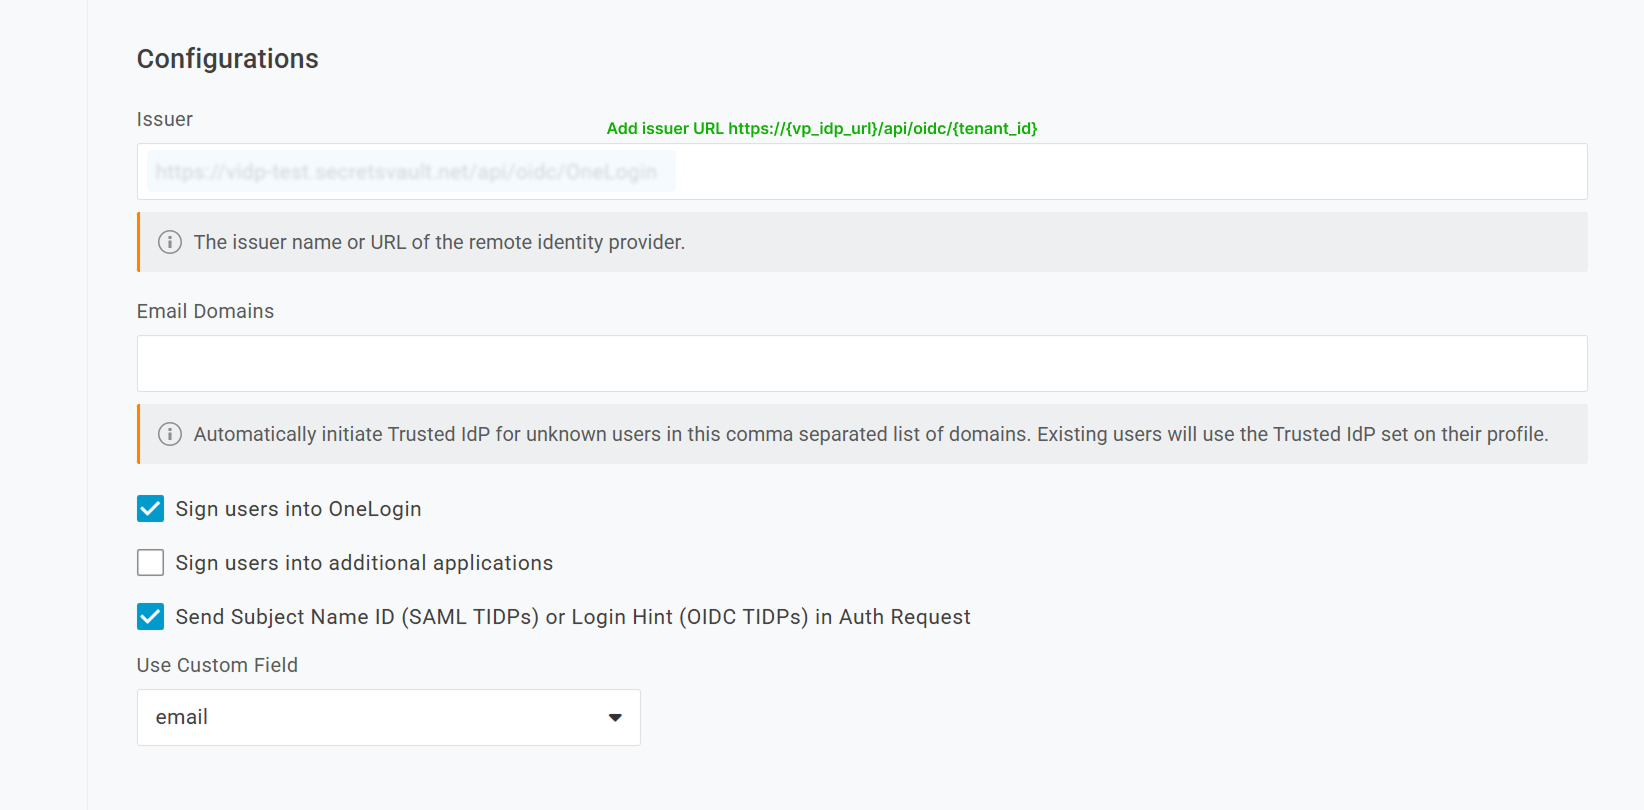
- In Configurations:
- Issuer / VP-IdP URL:
https://{vp_idp_url}/api/oidc/{tenant_id}. - Uncheck Sign users into additional applications.
- Check Sign users into OneLogin and Send Subject Name ID (SAML TIDPs) or Login Hint (OIDC TIDPs) in Auth Request.
- Custom Field:
email.
- Issuer / VP-IdP URL:
-
In User attribute:
- User Attribute Value:
{tidp.email}. - User Attribute Mapping:
Email.
- User Attribute Value:
-
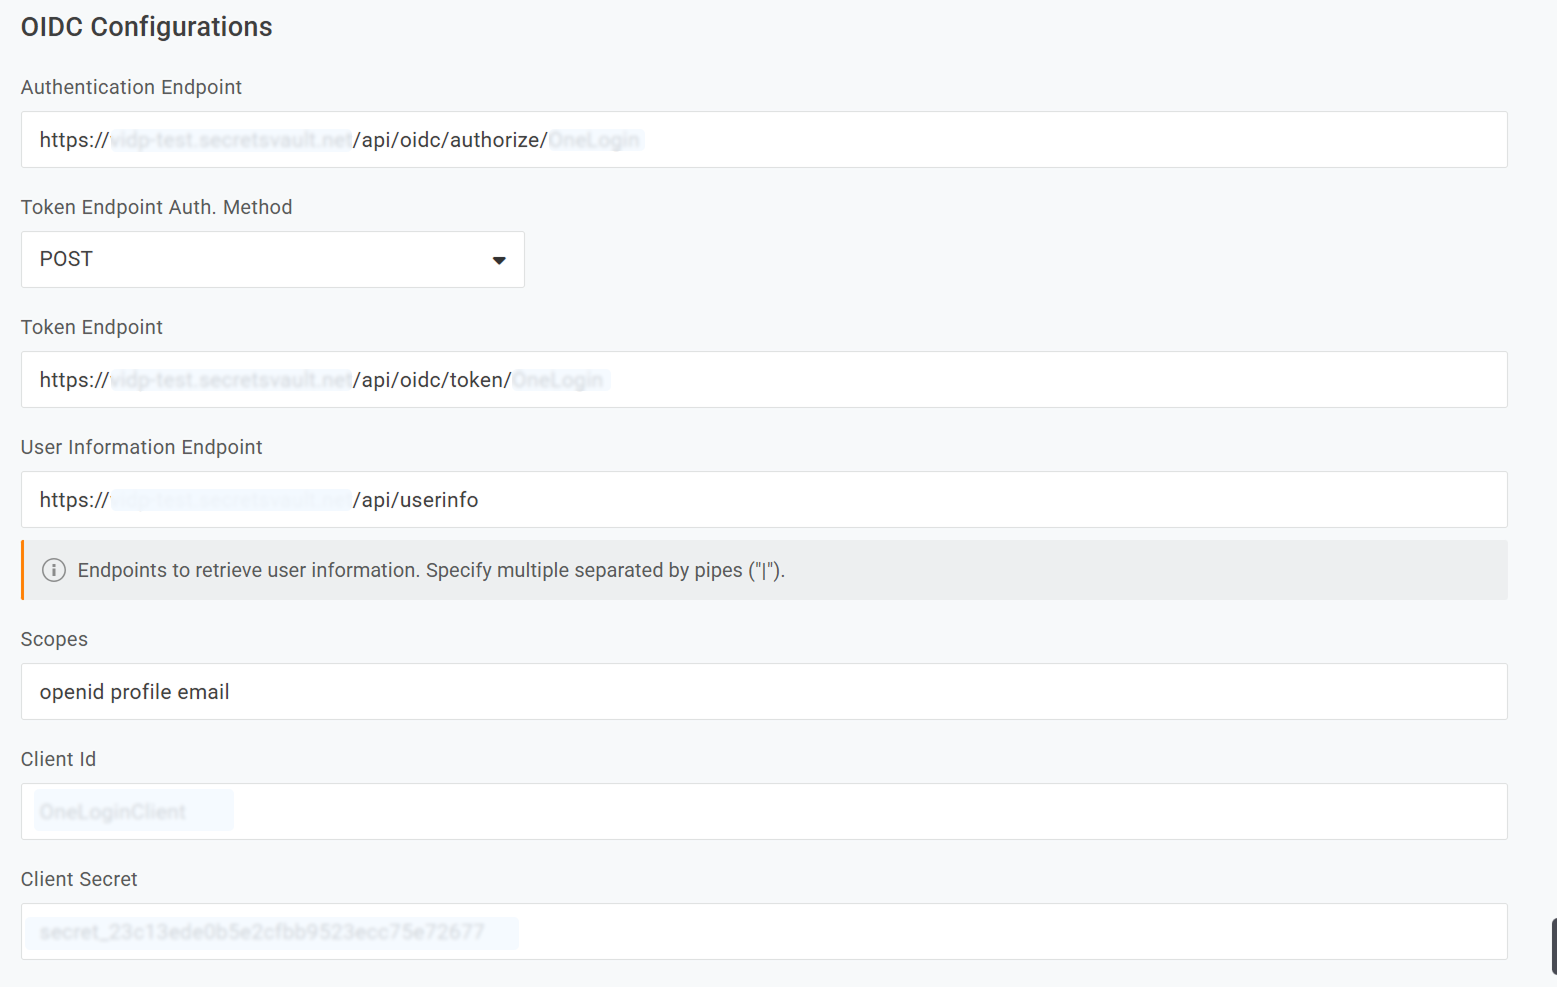
In OIDC Configurations, configure your VP-IdP metadata:
- Authentication Endpoint:
https://{vp_idp_url}/api/oidc/authorize/{tenant_id}. - Token Endpoint Auth. Method:
POST. - Token Endpoint:
https://{vp_idp_url}/api/oidc/token/{tenant_id}. - User Information Endpoint:
https://{vp_idp_url}/api/oidc/userinfo. - Scopes:
openid profile email. - Client Id: Obtain this value from Step 1.
- Client Secret: Obtain this value from Step 1.
- Authentication Endpoint:
-
In Enable/Disable, check Enable Trusted IDP.
-
In Login Options, check Show in Login panel if you want VP-IdP to appear as a visible option on the OneLogin login page, and provide the logo URL for easy visual identification.
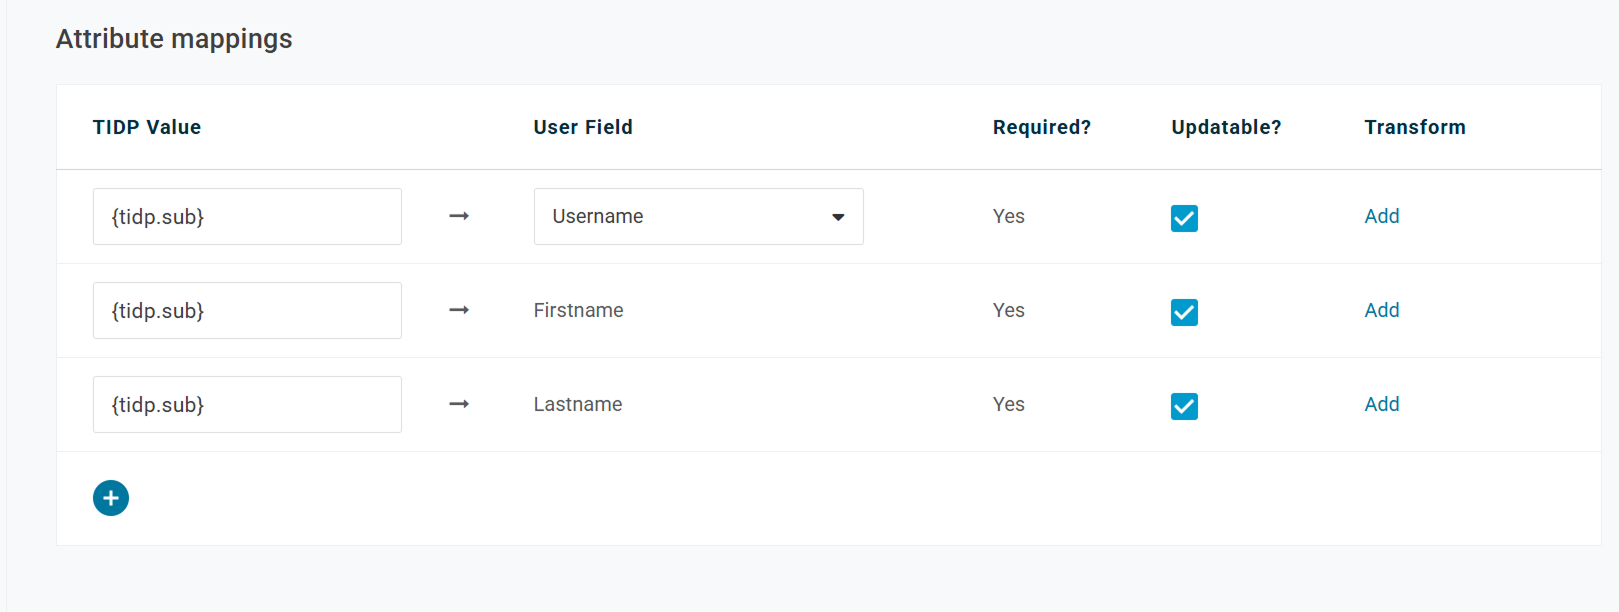
Step 3: Configure Attribute Mappings (JIT)
- Navigate to JIT > Attribute mappings.
- Configure mappings according to your schema. A typical mapping is: email → Email.
Quick Checklist
- VP-IdP tenant created without mandatory two-factor authentication (image-only or image + PIN).
- OIDC client in VP-IdP configured with correct OneLogin Redirect URIs (
/access/idpand optionally/mfa/v1/idp/auth_callback). - VP-IdP OIDC metadata loaded in OneLogin (authorize, token, userinfo, scopes, client ID, and client secret).
- Trusted IdP enabled and, if desired, visible on the OneLogin login panel.
- JIT attribute mappings configured.