Integrate Visual Passcodes with Auth0
This guide explains how to integrate your Visual Identity Provider (Visual Passcodes) as a Custom Social Connection in your Auth0 instance. By following these steps, you will connect both platforms securely using client credentials, metadata, and OIDC scopes.
Prerequisites
- A Visual Passcodes tenant and an admin user (provided by our team).
- Access to the Visual Passcodes BackOffice.
- Admin access to your Auth0 instance.
Step 1 - Log into Visual Passcodes BackOffice
-
Go to the Visual Passcodes BackOffice and sign in.
-
Navigate to the Clients section.
-
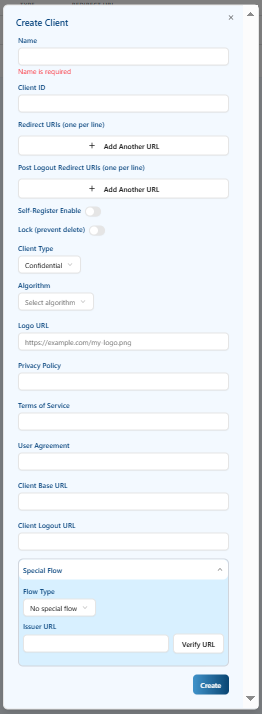
Click the "Add Client" button.
-
Fill in the form:
- Name: any label for identification.
- Client ID: a unique identifier for the integration.
- Redirect URIs: leave blank for now (will be completed later).
- Client Type:
Confidential - Algorithm:
RS256
-
Click Create and copy the generated
Client IDandClient Secret.
Step 2 - Copy OIDC Endpoints and Scopes
- In the left menu of Visual Passcodes BackOffice, click Tenant Config and then OAuth Configuration.
- Copy the Authorization URL, Token URL, and the OAuth Scopes from the Detailed Metadata. You may also need the
userinfo_endpointfrom the detailed metadata for the fetch user profile script.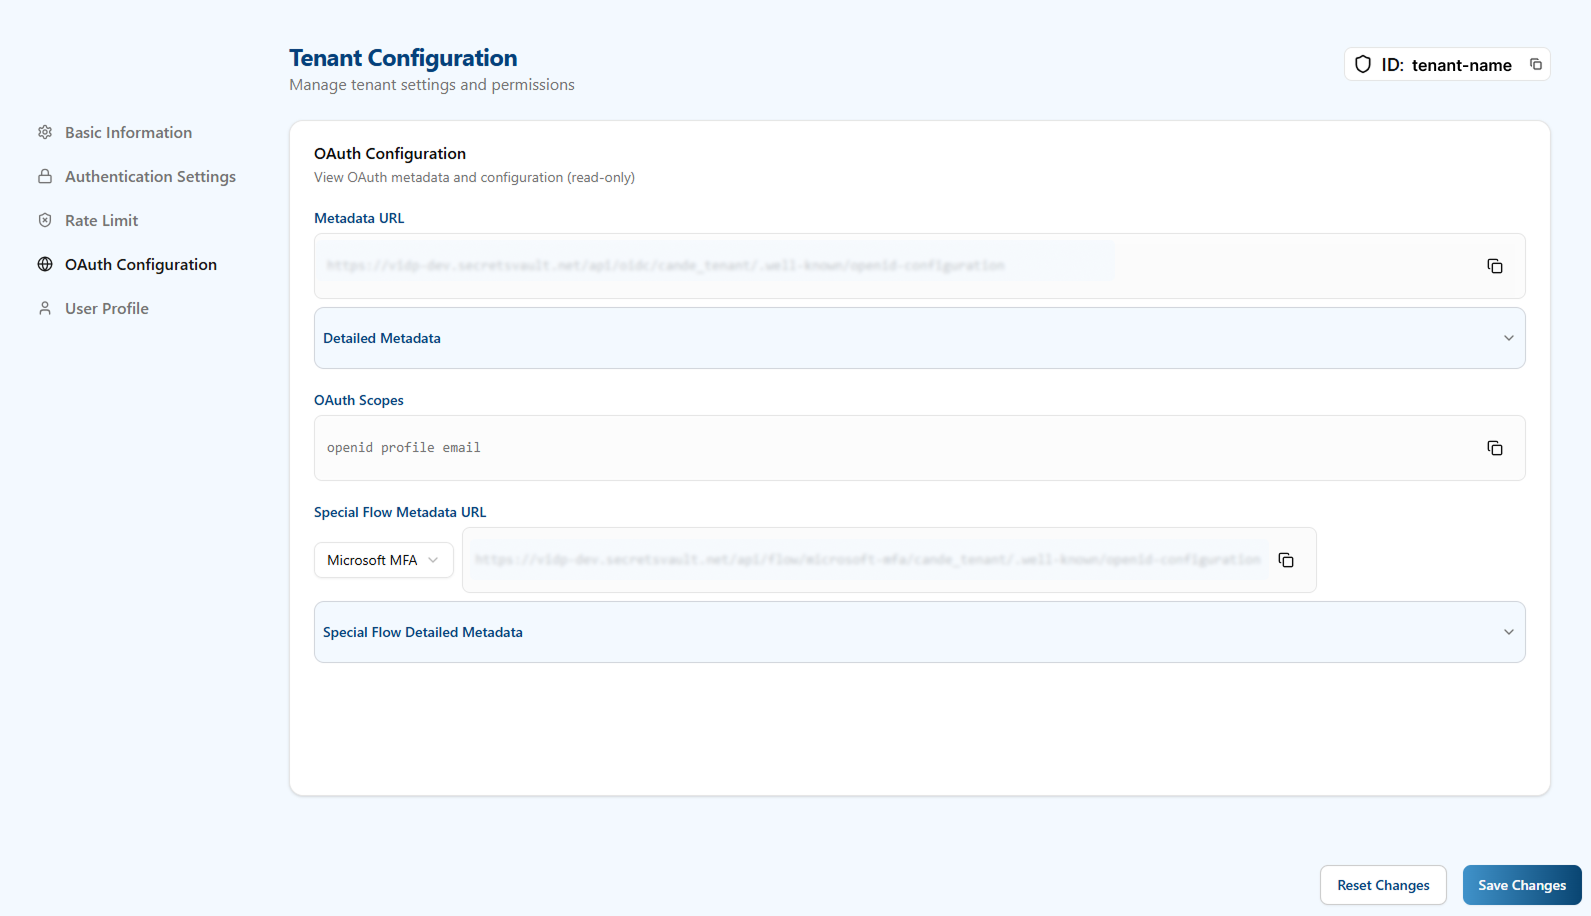
Step 3 - Add the Custom Social Connection in Auth0
-
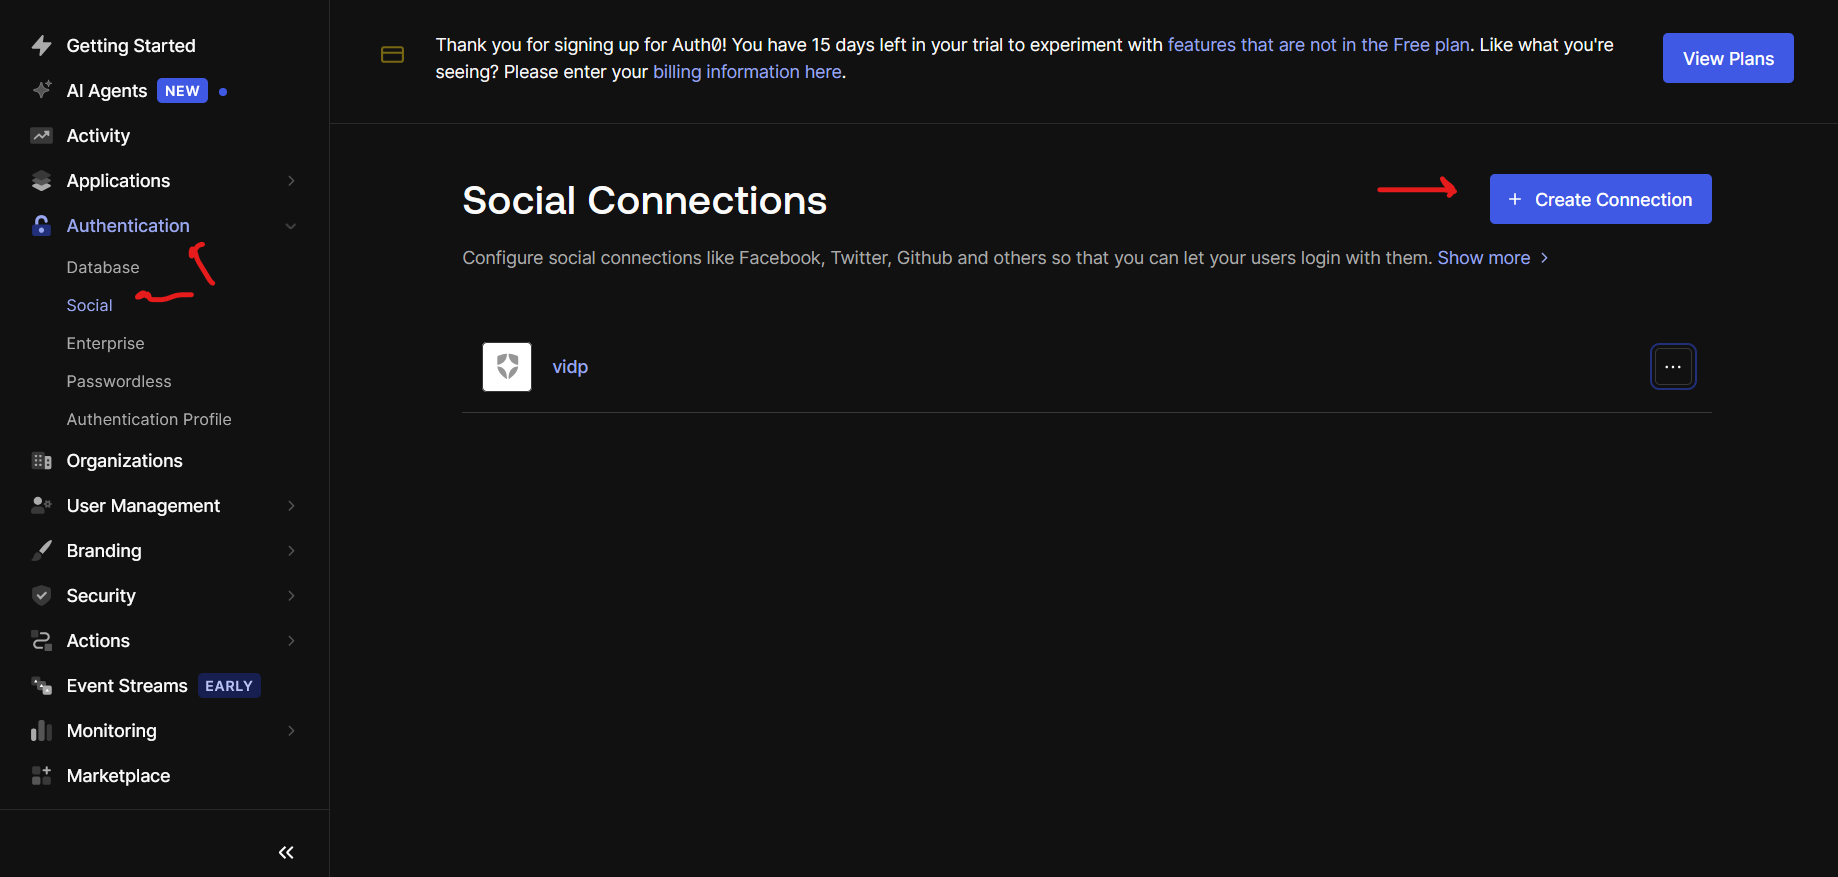
Log into your Auth0 Dashboard.
-
Navigate to Authentication > Social.
-
Click "Create Connection".
-
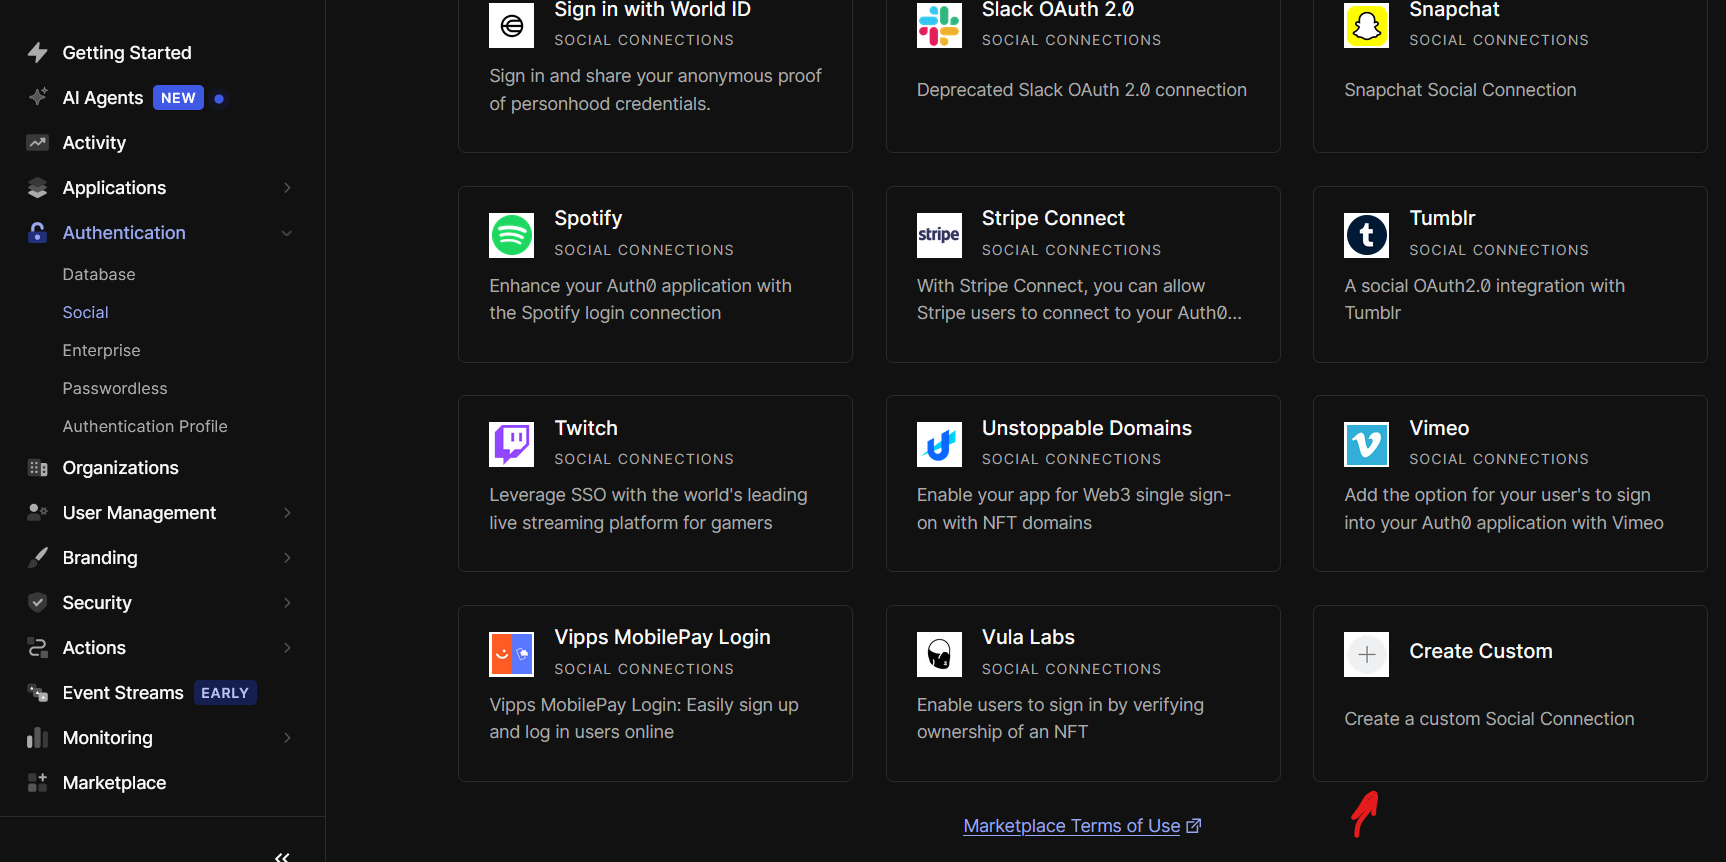
Select "Create Custom".
-
Fill in the required fields:
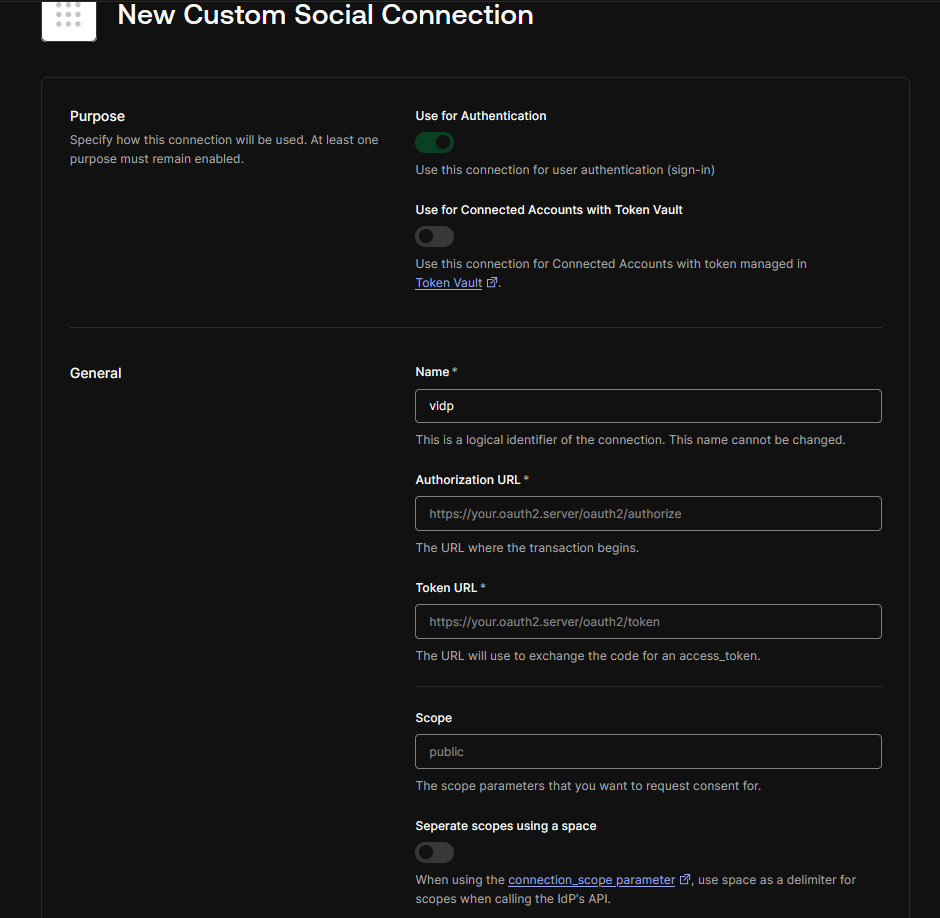
- Connection Name: A descriptive name for your connection (e.g.,
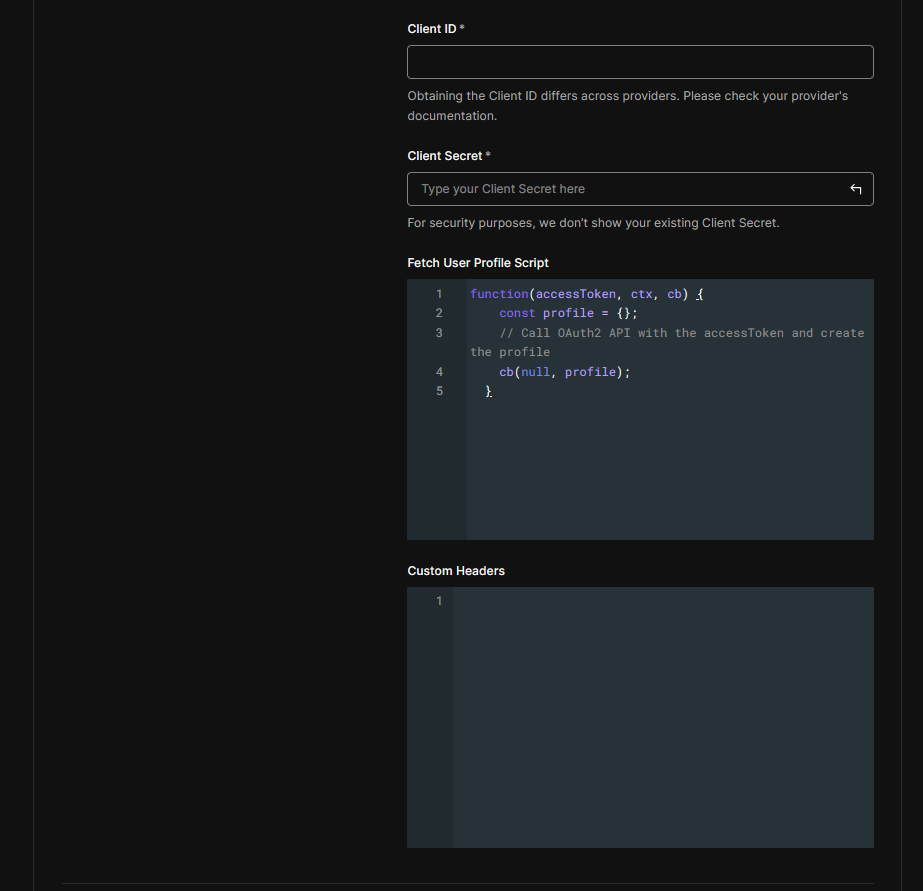
VisualAuthSocial). - Client ID: Paste the
Client IDfrom the Visual Passcodes client. - Client Secret: Paste the
Client Secretfrom the Visual Passcodes client. - Authorization URL: Paste the Authorization URL obtained from Visual Passcodes OAuth Configuration.
- Token URL: Paste the Token URL obtained from Visual Passcodes OAuth Configuration.
- Scope: Paste the OAuth Scopes you copied from Visual Passcodes (e.g.,
openid profile email). - Fetch User Profile Script: Provide a Node.js script to fetch user profile information.
function fetchUserProfile(accessToken, context, callback) {const token = context.id_token;if (!token || typeof token !== "string") {return callback(new Error("Invalid identity token."));}// A JWT has the format: header.payload.signatureconst parts = token.split(".");if (parts.length !== 3) {return callback(new Error("Invalid JWT format (must have 3 parts)."));}const payload = parts[1];try {const decodedBuffer = Buffer.from(payload, "base64url");const jsonString = decodedBuffer.toString("utf8");const claims = JSON.parse(jsonString);const profile = {user_id: claims.sub,email: claims.email,email_verified: claims.email_verified,name: claims.name,};callback(null, profile);return claims;} catch (e) {return callback(new Error(`Error decoding or parsing JWT payload: ${e}`));}}- User ID Attribute:
sub(standard OIDC claim for unique user identifier). - Email Attribute:
email(standard OIDC claim for email address).
- Connection Name: A descriptive name for your connection (e.g.,
-
Click "Create".
Step 4 - Get Redirect URI and Update Visual Passcodes Client
-
After creating the connection, Auth0 will display a setup guide or the connection's settings. Look for the "Auth0 Redirect URL" and copy it. It will look something like
https://YOUR_AUTH0_DOMAIN/login/callback.- To be able to use the test connection button need to add in the redirect url
https://manage.auth0.com/tester/callback
- To be able to use the test connection button need to add in the redirect url
-
Go back to the Visual Passcodes BackOffice > Clients section.
-
Edit the client you previously created.
-
Paste the Auth0 Redirect URI into the Redirect URIs field.
-
Save the changes.
Step 5 - Enable the Connection for an Application
- In your Auth0 dashboard, navigate to Applications > Applications.
- Select the application where you want to enable Visual Passcodes login.
- Go to the Connections tab.
- Find the custom social connection you created (e.g.,
VisualAuthSocial) and switch it on.
Finished!
Your integration is now complete. Your Auth0 login page will now show a button to authenticate via Visual Passcodes.
If you experience any issues, please verify:
- Your client credentials are correctly set in Auth0.
- The Redirect URIs are properly updated in Visual Passcodes.
- The OIDC endpoints (Authorization URL, Token URL, Userinfo URL) are correctly extracted and configured.
- The scopes are correctly configured in Auth0.
- The "Fetch User Profile Script" correctly maps claims from your VIDP to Auth0 user profiles.
For support, contact your integration lead or support team.