Integrate Secrets Vault Identity with Keycloak
This guide explains how to integrate your Visual Identity Provider (Secrets Vault Identity) as an OpenID Connect (OIDC) identity provider in your Keycloak instance. By following these steps, you will connect both platforms securely using client credentials, metadata, and OIDC scopes.
Prerequisites
- A Secrets Vault Identity tenant and an admin user (provided by our team).
- Access to the Secrets Vault Identity BackOffice.
- Admin access to your Keycloak instance.
Step 1 - Log into Secrets Vault Identity BackOffice
-
Go to the Secrets Vault Identity BackOffice and sign in.
-
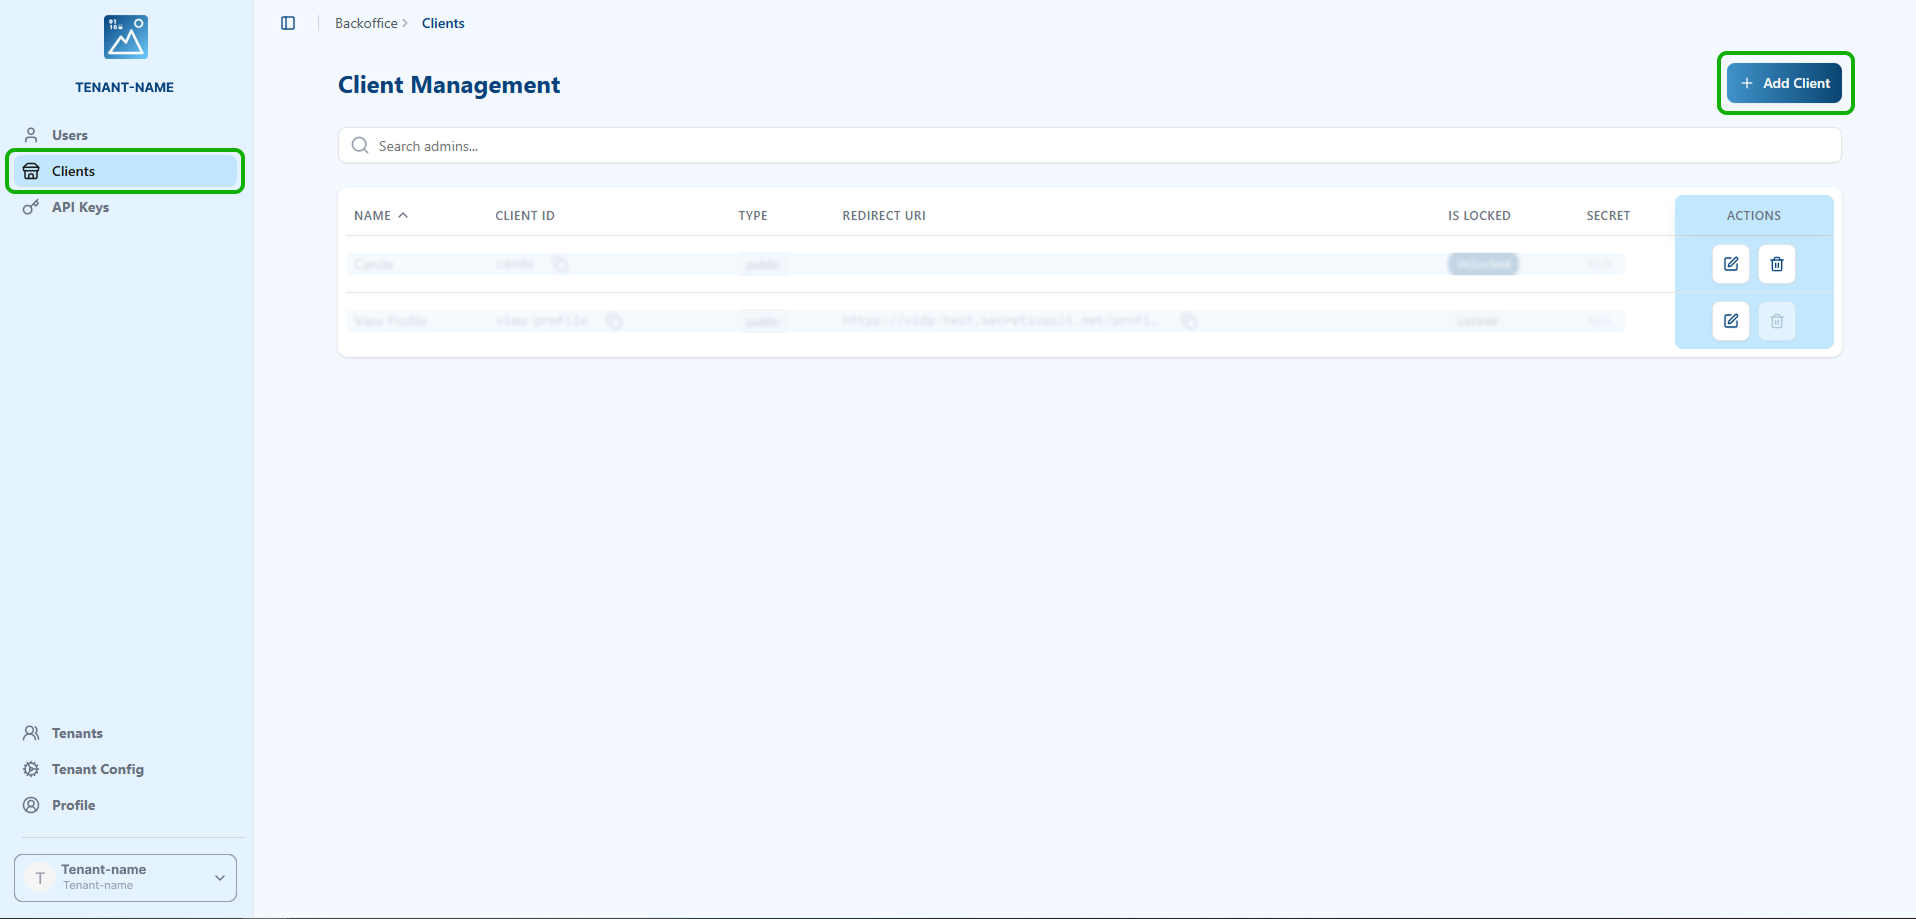
Navigate to the Clients section.
-
Click the "Add Client" button.
-
Fill in the form:
- Name: any label for identification.
- Client ID: a unique identifier for the integration.
- Redirect URIs: leave blank for now (will be completed later).
- Client Type:
Confidential
-
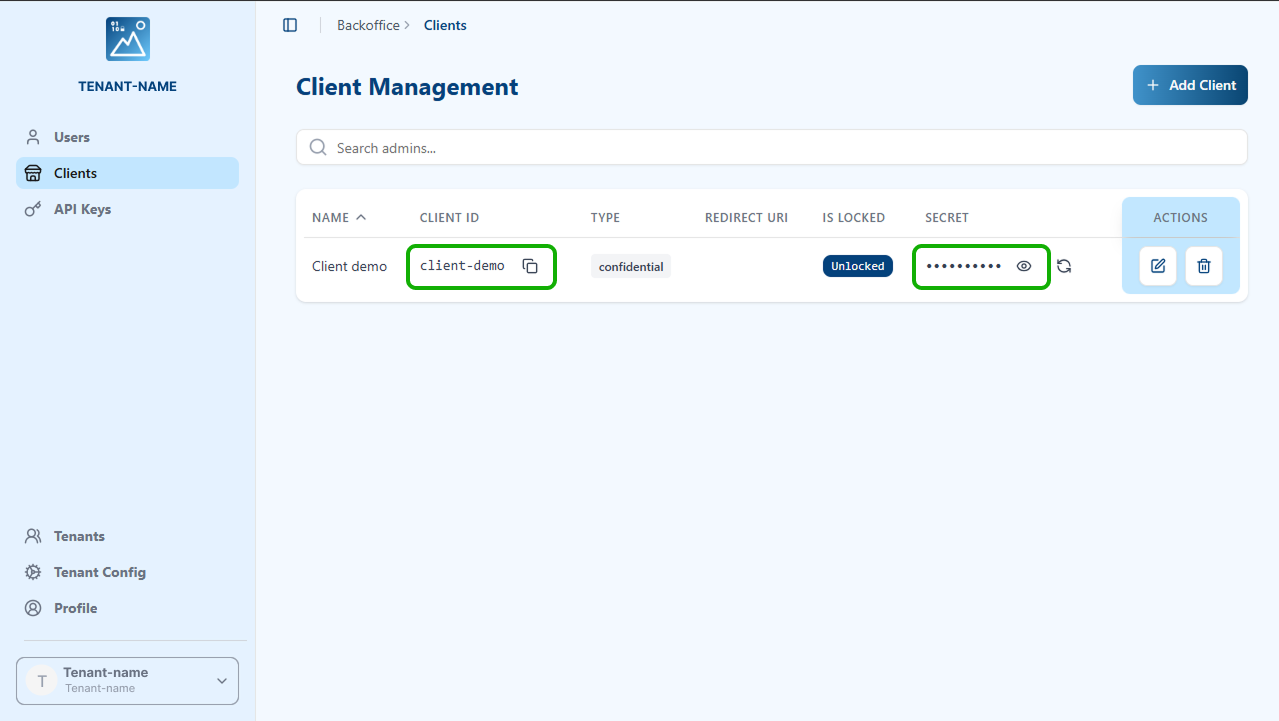
Click Create and copy the generated
Client IDandClient Secret.
Step 2 - Copy Metadata URL & Scopes
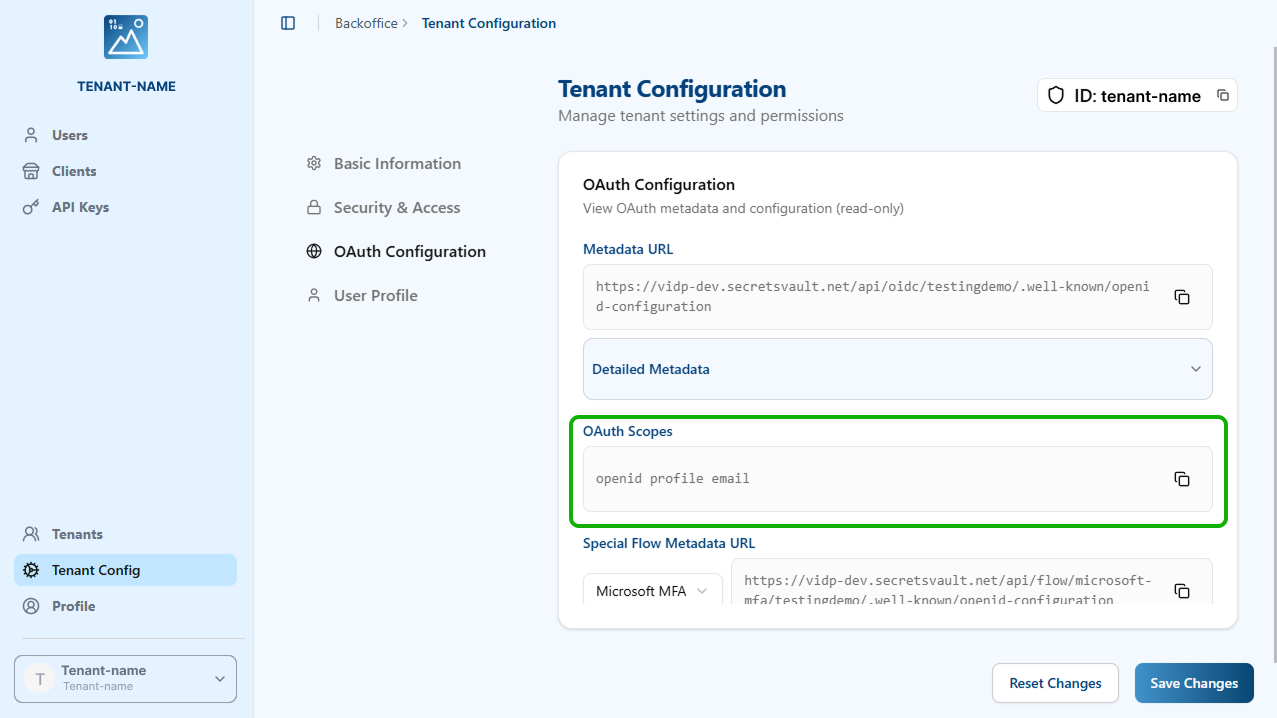
- In the left menu, click Tenant Config.
- Copy the Metadata URL and the OAuth Scopes.
Step 3 - Add the Identity Provider in Keycloak
- Log into your Keycloak Admin Console.
- Go to the realm where you want to integrate Secrets Vault Identity.
- Navigate to Identity Providers > Add provider > OpenID Connect.

-
Fill in the required fields:
- Alias: e.g.
visualauth - Display Name:
Test Secrets Vault Identity - Discovery Endpoint: paste the Metadata URL from Secrets Vault Identity.
- Alias: e.g.
Keycloak will automatically fill in all the URLs (Auth, Token, JWKS, etc.)
-
In the Client Authentication section:
- Method:
Client secret sent as post - Client ID & Secret: paste what you copied from the Secrets Vault Identity BackOffice.
- Signature Algorithm: EdDSA
- Method:
Step 4 - Enable Trust Email & Set Scopes
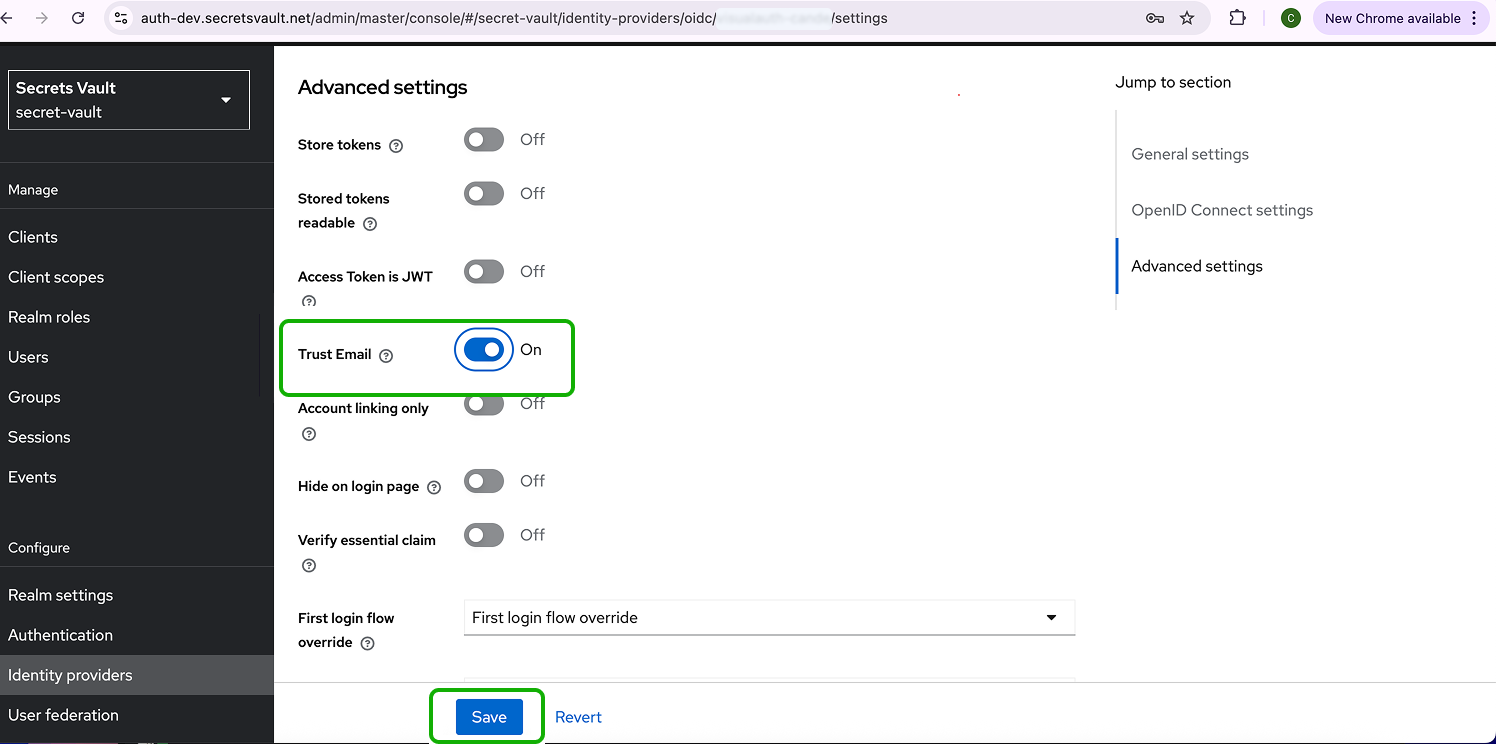
- Once created, go to Advanced Settings of the new provider.
- Enable Trust Email.
- In the OpenID Connect Settings, paste the OAuth scopes you copied earlier:
openid profile email
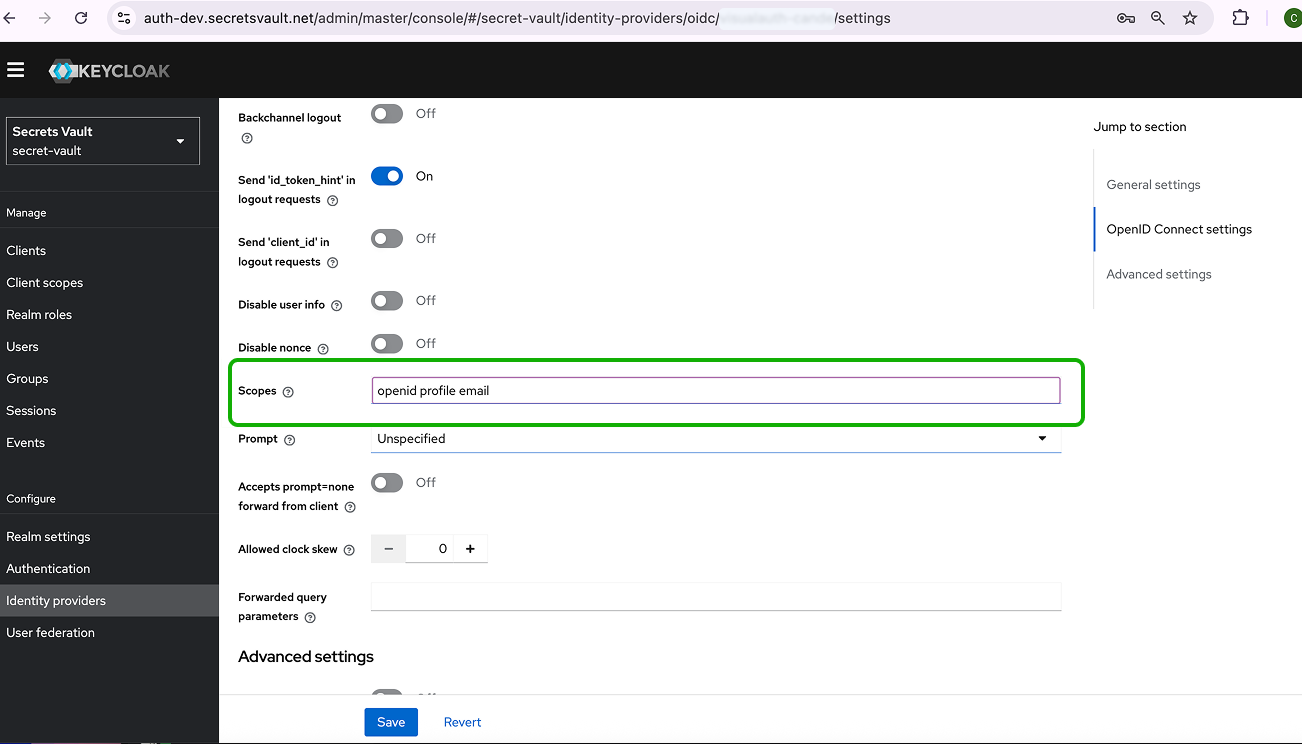
- Click Save.
Step 5 - Copy Redirect URI and Update Secrets Vault Identity Client
- In your new Keycloak Identity Provider details, copy the Redirect URI.
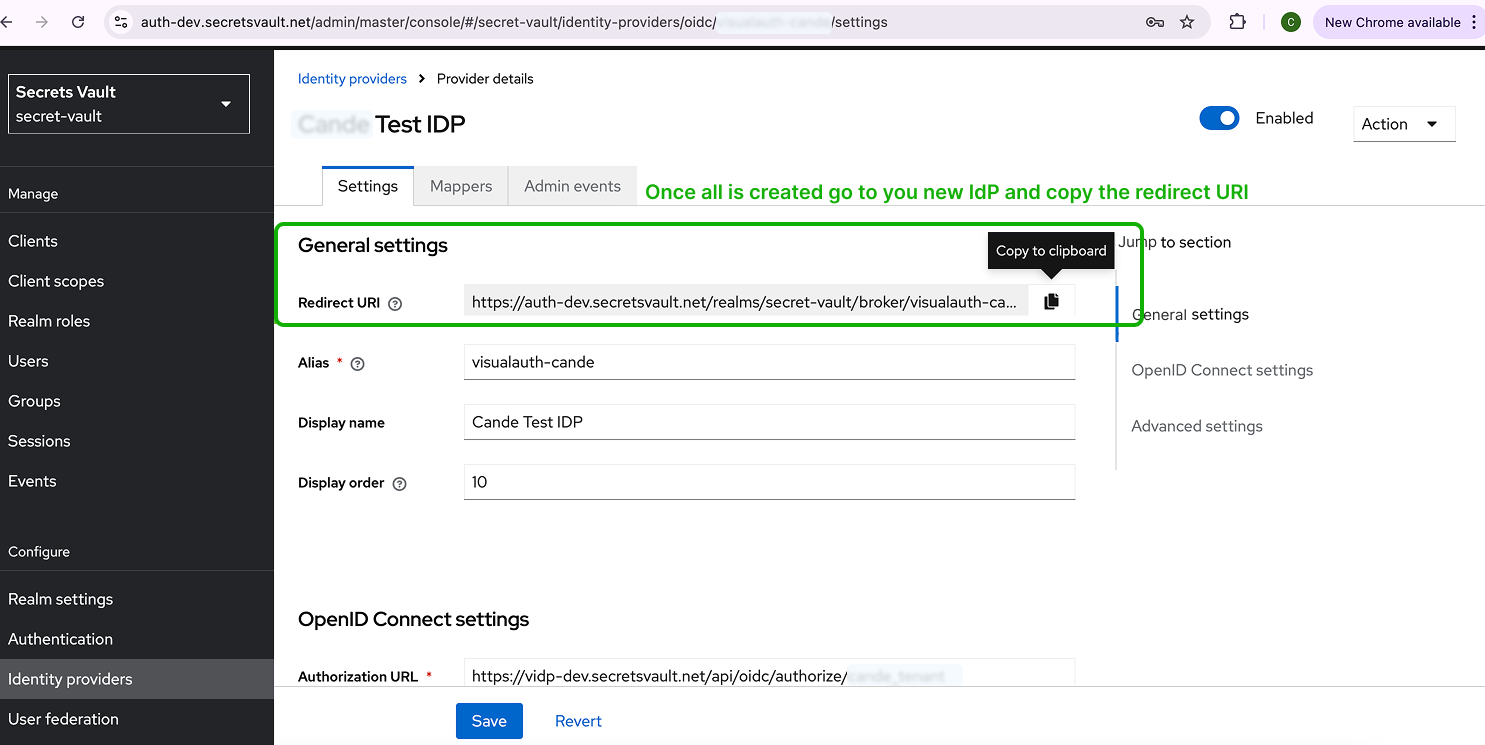
- Go back to the Secrets Vault Identity BackOffice > Clients section.
- Edit the client you previously created.
- Paste the Keycloak Redirect URI into the Redirect URIs field.

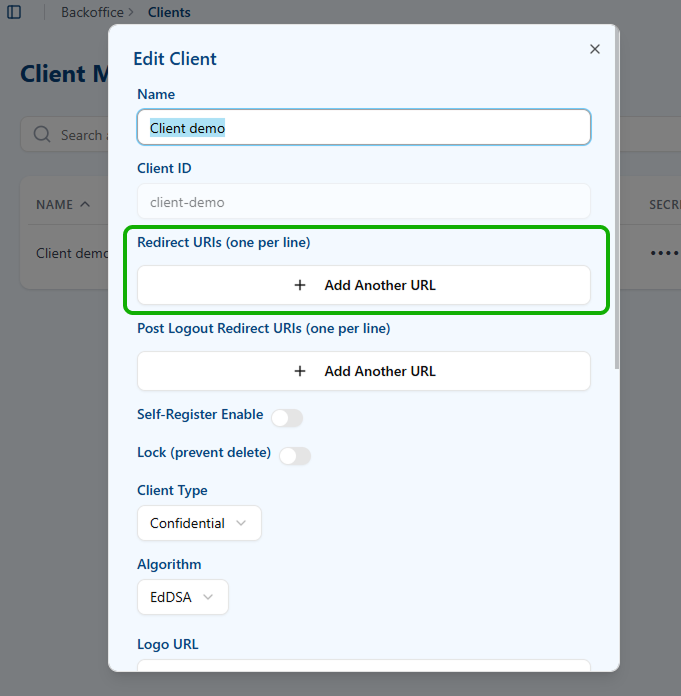
- Save the changes.
Finished!
Your integration is now complete. Keycloak will now redirect users to authenticate via your Secrets Vault Identity using OIDC with secure visual authentication and EdDSA signatures.
If you experience any issues, please verify:
- Your client credentials are correctly set.
- The redirect URI is properly updated.
- The discovery endpoint is reachable.
Trust EmailandScopesare correctly configured.
For support, contact your integration lead or support team.