Integrate Secrets Vault Identity with Google Workspace
1. Introduction
Google Workspace supports SSO with a custom OIDC identity provider. For users assigned to this SSO profile, Google delegates the primary sign-in to Secrets Vault Identity. This profile is assigned by group or organizational unit; it does not configure Secrets Vault Identity as a standalone second factor in Google’s sign-in flow. For a second-factor integration, use an identity broker that supports that specific delegation pattern and verify its configuration separately. See the Google setup guidance.
This guide explains the steps needed to set up Secrets Vault Identity (VIdP) as the SSO authentication method for Google Workspace.
2. Configure Secrets Vault Identity Tenant
Before configuring Google, you need to configure an authentication tenant in the VIdP. To do so, follow these steps:
2.1 Create the tenant
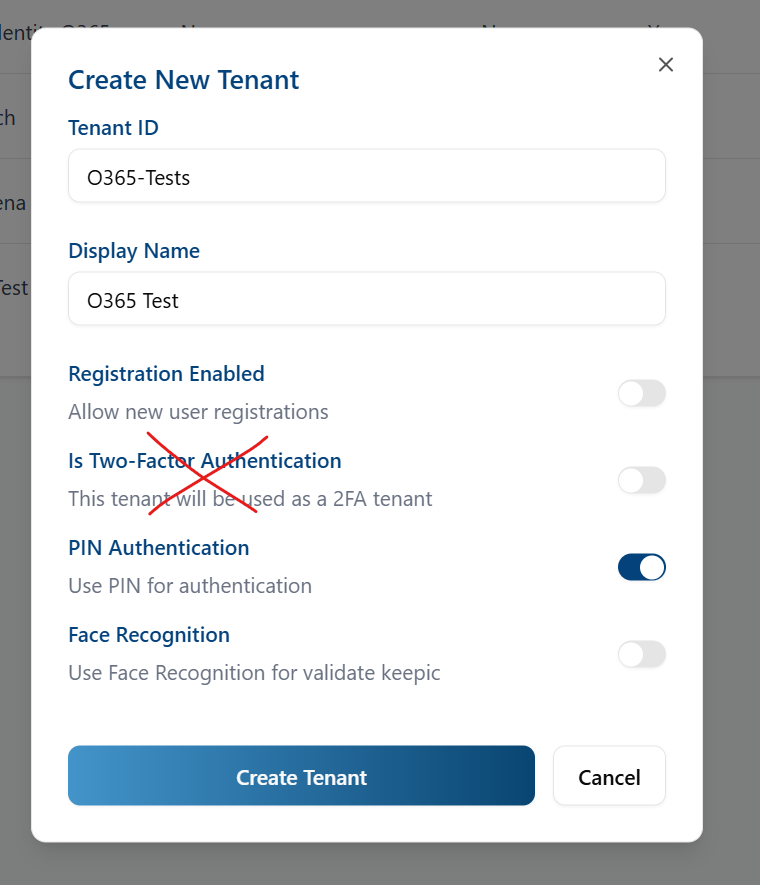
If you don’t already have a tenant, you need to create a new one. To create a new tenant you must have global admin permissions. This guide provides basic configuration guidance; for further information about tenant configuration, check the VIdP manual available online.
When creating the tenant in the VIdP Backoffice, choose an authentication method suitable for primary sign-in. Do not enable the “Is Two-Factor Authentication” option for this standard OIDC SSO integration. You may enable “PIN Authentication” to require a PIN in addition to the image, or leave it disabled to require only the image.
2.2 Configure tenant
For this tenant, register a dedicated confidential OIDC client representing Google Workspace. Google needs this client’s ID and secret to perform the authorization code flow. See Google’s OIDC requirements.
2.2.1 Select Tenant
If you are not already in the proper tenant, go to the bottom of the left menu and select your tenant in the drop-down menu.
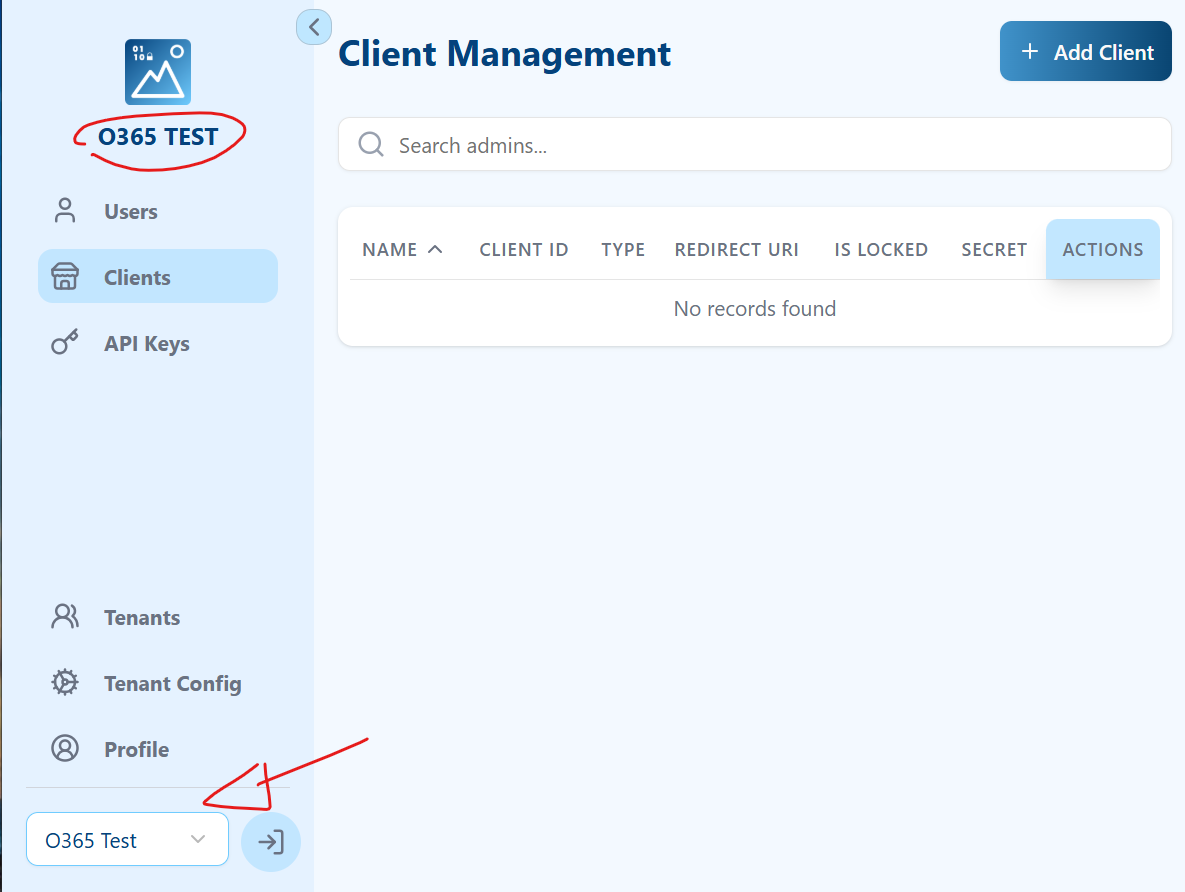
You can confirm that you are in the correct tenant by checking the tenant name under the logo at the top of the left menu.
2.2.2 Create Google OIDC client
Select the “Clients” option in the left menu and, on the new page, click the “+ Add Client” button located at the top right of the page.
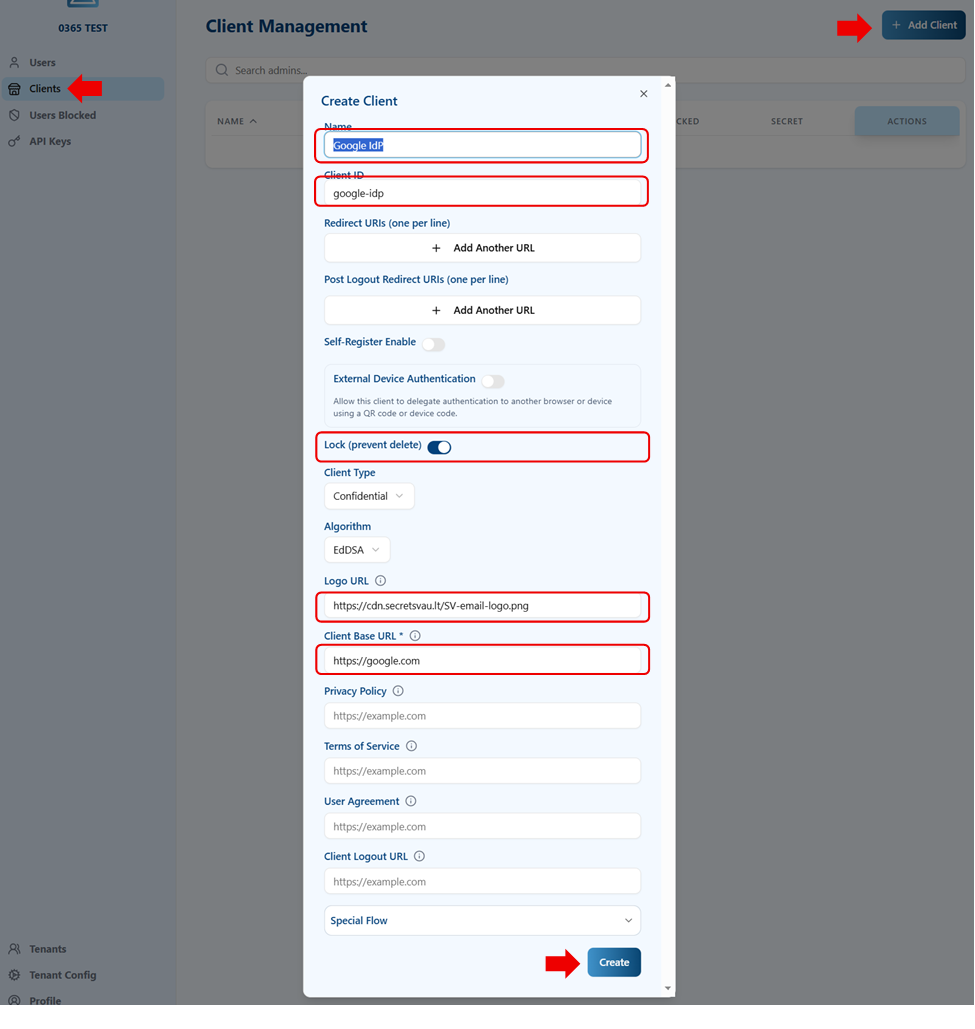
Enter a descriptive name and client ID; set Client type to Confidential and supply the required logo URL. Keep ‘No special flow’ for this standard OIDC integration. Choose the token-signing algorithm supported by your deployment and verify the issued ID token with a test sign-in.
- Name: an easy-to-read name.
- Client ID: an internal identifier (it cannot contain spaces).
- Lock (prevent delete): enable it.
- Client Type: Confidential (the default).
- Algorithm: EdDSA.
- Logo URL: the public URL of the company logo.
- Client Base URL: the origin URL of the service (e.g.,
https://google.com).
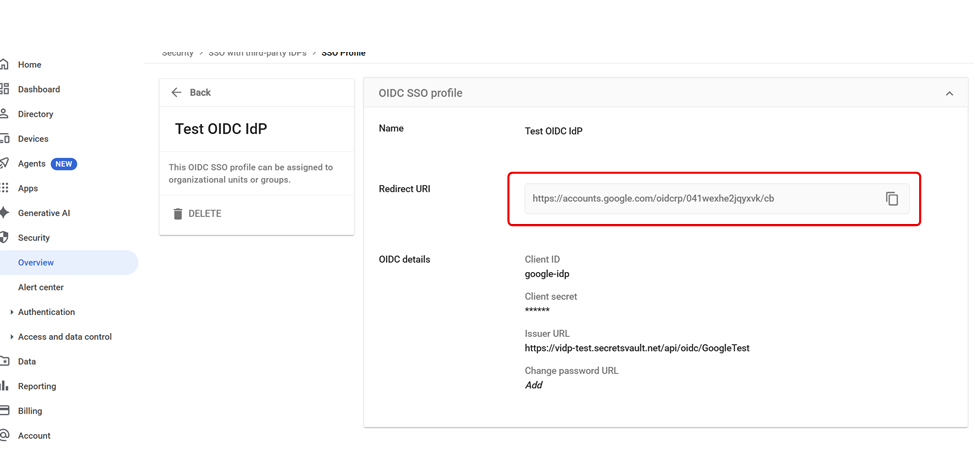
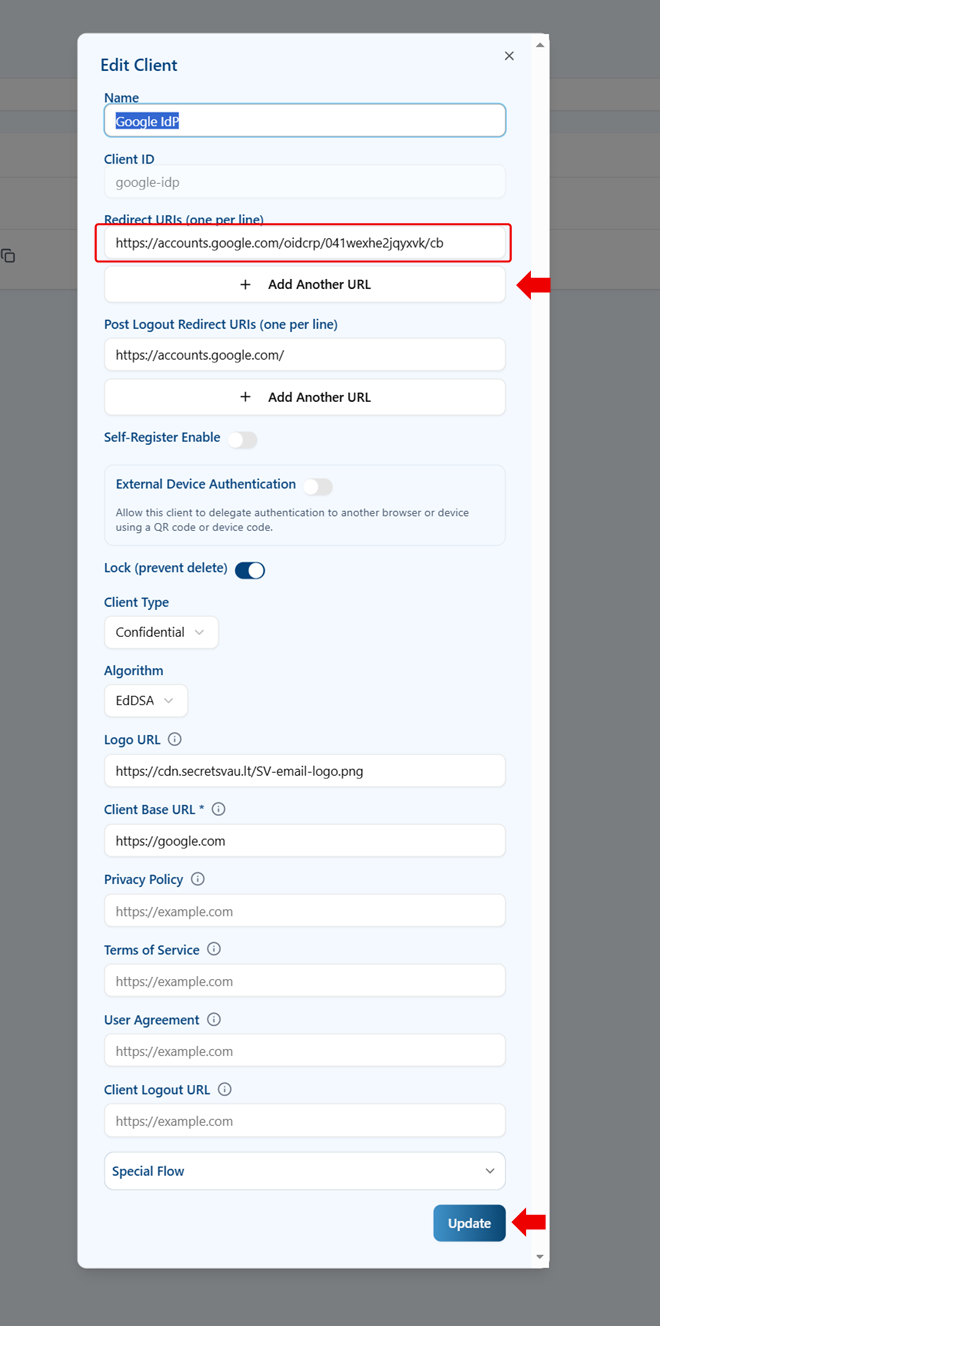
Leave Redirect URIs empty at this stage. After you save the Google OIDC profile, copy the Redirect URI shown by Google and add that exact URI to this client. Do not substitute a guessed Google callback URL. See the Google setup guidance.
The other fields (Privacy Policy, Terms of Service and User Agreement) are recommended for legal compliance. The URLs should point to the company’s web pages. For instance, for the Secrets Vault privacy policy, we use the URL of the policy published on our site (https://secretsvault.com/privacy-policy/).
All client fields except the Client ID can be modified later.
Click Create to finish. You are now ready to configure the VIdP tenant as a third-party OIDC identity provider for Google.
2.2.3 Compile Google OIDC configuration data
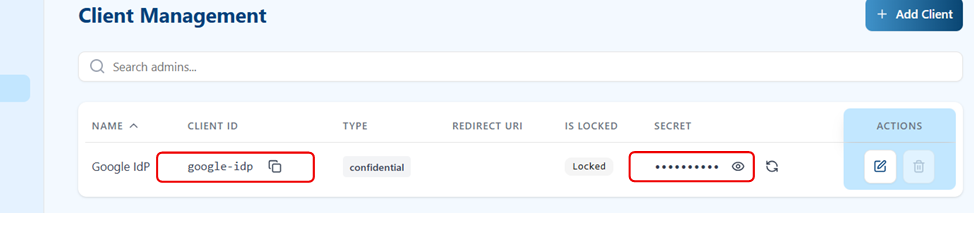
On the Clients menu, copy the Client ID and Secret values of the client created in the previous step.
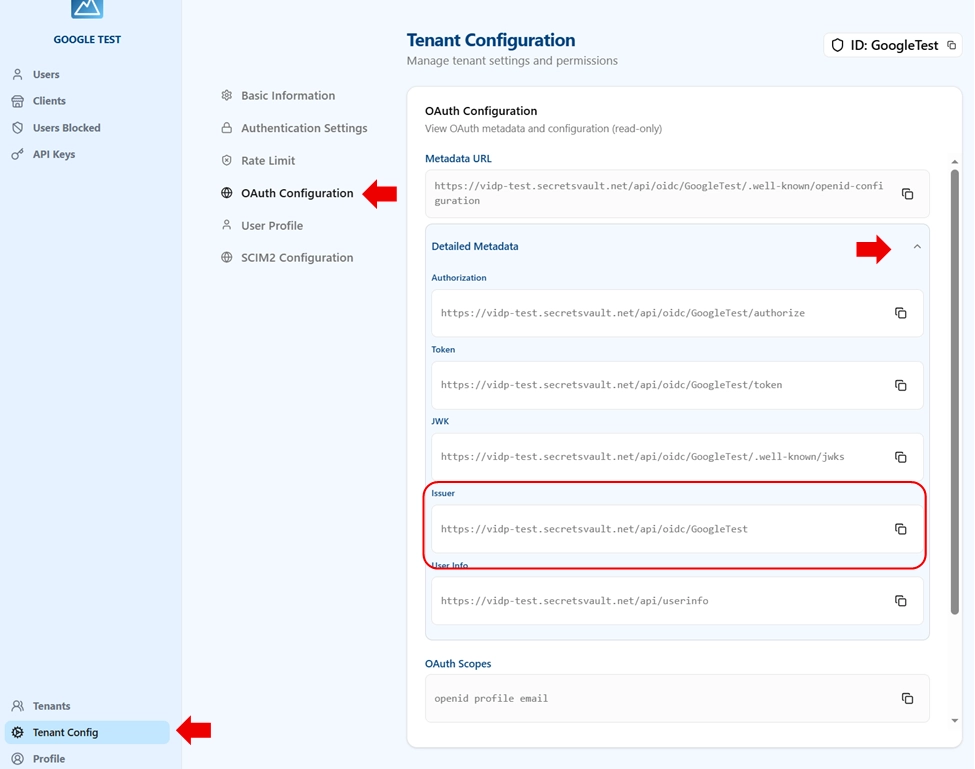
Open Tenant → OAuth Configuration → Primary OIDC Configuration. Expand Detailed Metadata and copy the Issuer value. Check that it exactly matches the issuer field at the tenant’s metadata URL; enter the issuer, not the /.well-known/openid-configuration URL, in Google.
3. Configure Google
3.1 Create users
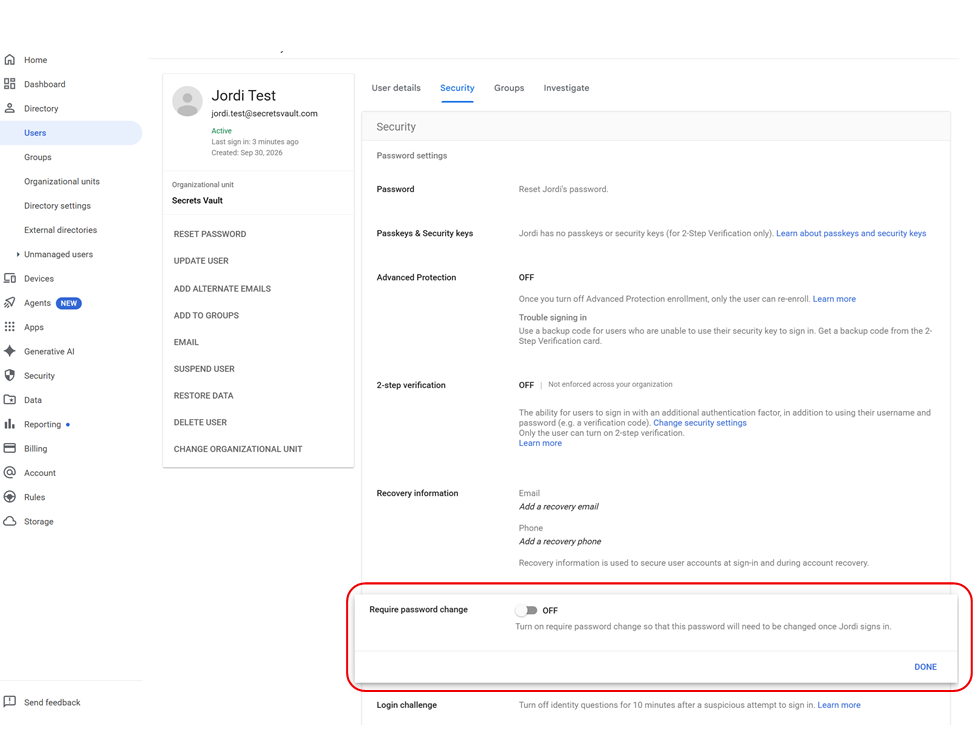
Ensure each user who will sign in through this SSO profile also exists and can authenticate in Secrets Vault Identity. The email claim returned to Google must match that user’s primary Google Workspace email address. SSO does not itself create or synchronize users. See the Google OIDC prerequisites and the email scope.
3.2 Create group
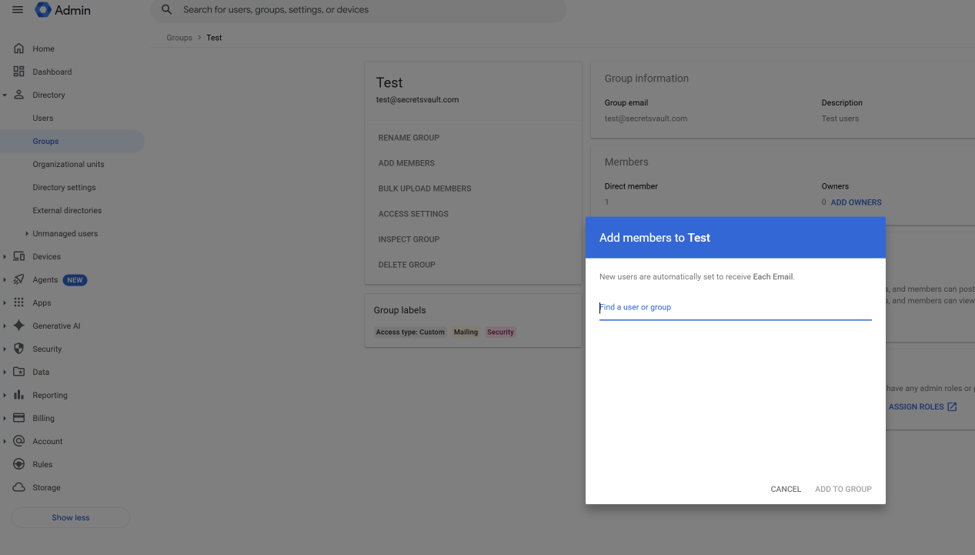
Create a specific group for the users whose authentication will be delegated to the external IdP, and add members to it: Directory → Groups.
3.3 Register third-party OIDC Identity Provider
Create a new third-party identity provider by going to Security → Authentication → SSO with third party IdP and clicking ADD OIDC PROFILE.
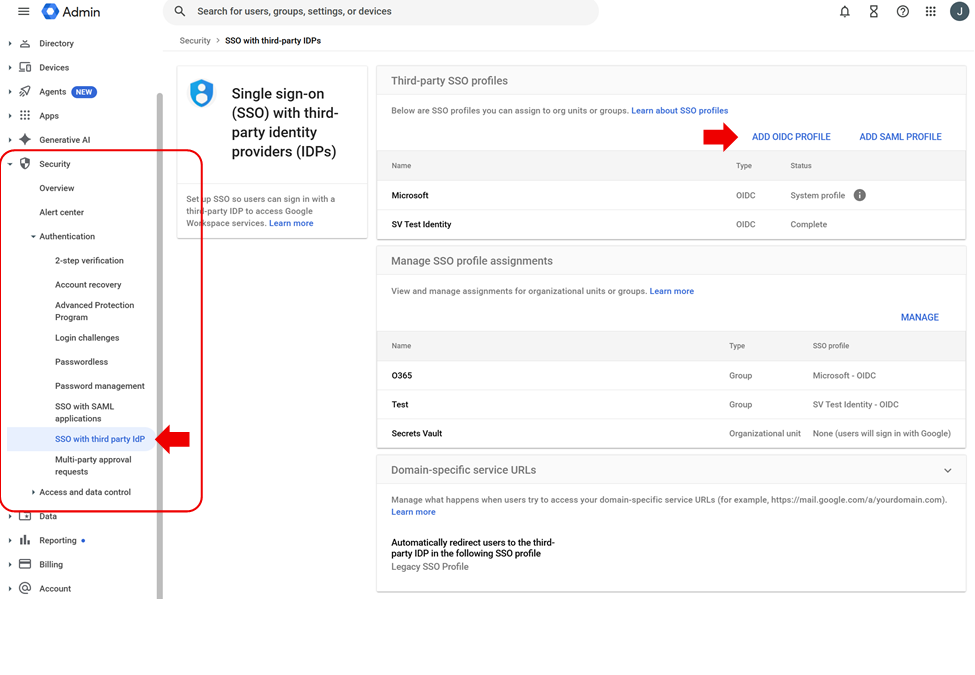
Enter a profile name and add the Client ID, Client secret and Issuer URL values collected when creating the Secrets Vault Identity tenant.
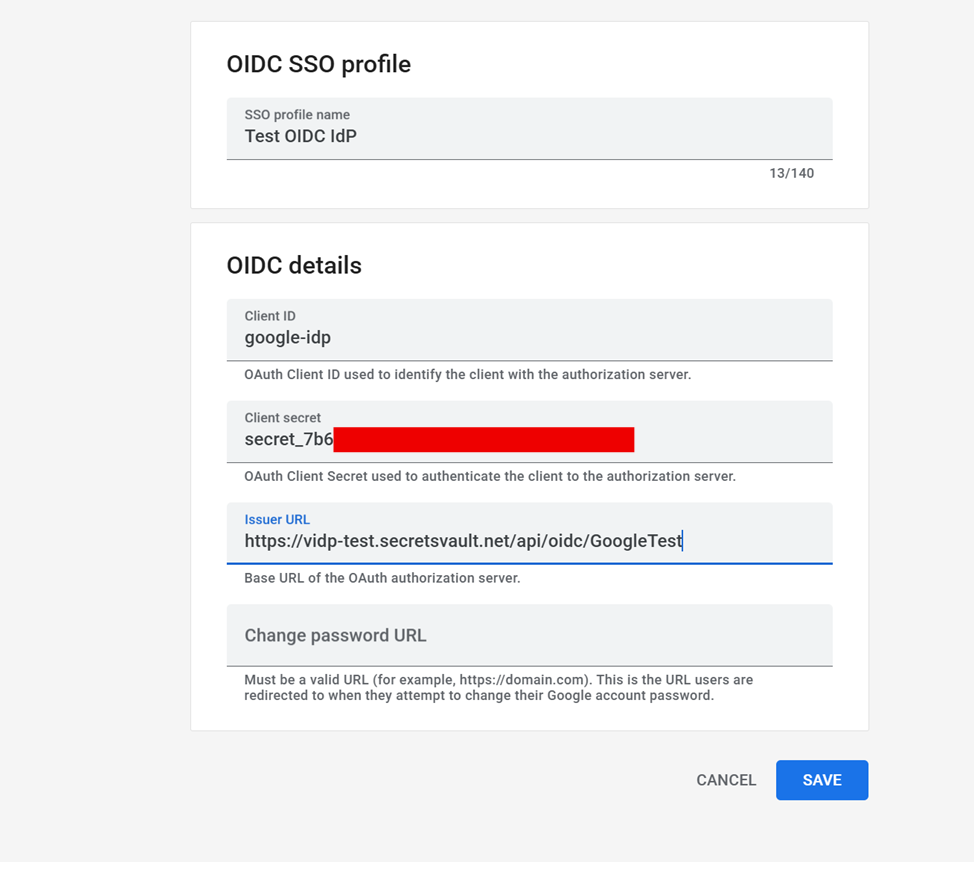
Click SAVE, then copy the Redirect URI displayed on the new Google OIDC SSO profile. Register this exact URI under the Secrets Vault Identity client’s Redirect URIs before assigning the profile to users.
4. Update Secrets Vault Identity Tenant
4.1 Update OIDC client configuration
Before finishing the Google configuration, go back to the Secrets Vault Identity platform and add the Redirect URI from Google to the client configuration of the tenant:
5. Finish Google Configuration
5.1 Assign OIDC IdP to users
In Security → Authentication → SSO with third party IdP, click MANAGE.
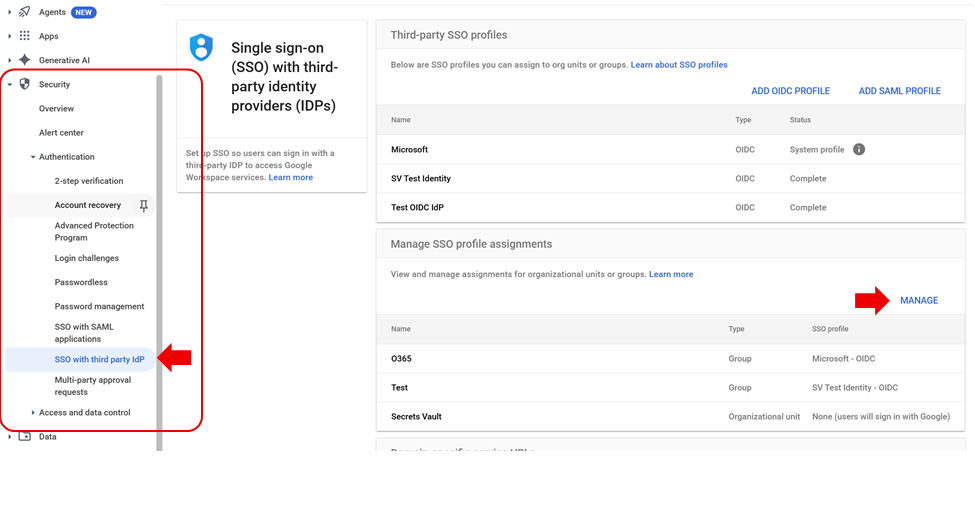
On the new page, expand the Groups drop-down. In the search field, type the first letters of the group name and select it from the list.
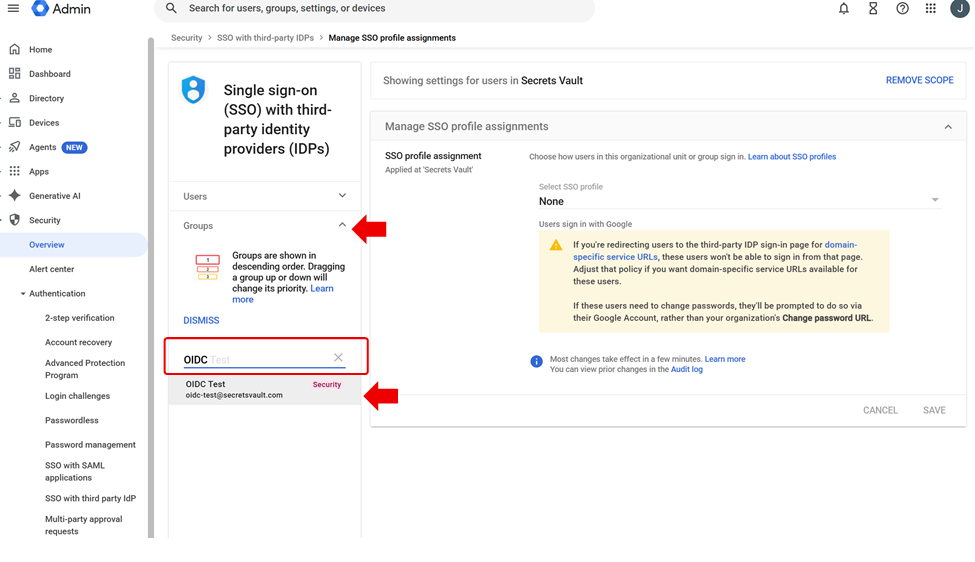
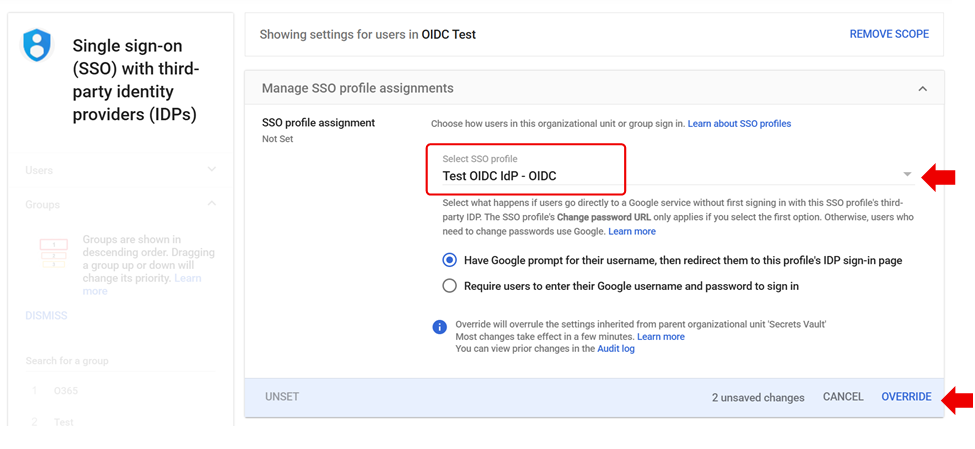
Under Manage SSO profile assignments, select the group created in step 3.2, choose ‘Another SSO profile’ and select the new OIDC profile, then save the assignment. If Google shows an override warning, review which parent setting this group overrides. Keep a recovery administrator group assigned to ‘None’ so that administrators can always sign in directly with Google. Google assigns profiles by group or organizational unit, not directly per user.
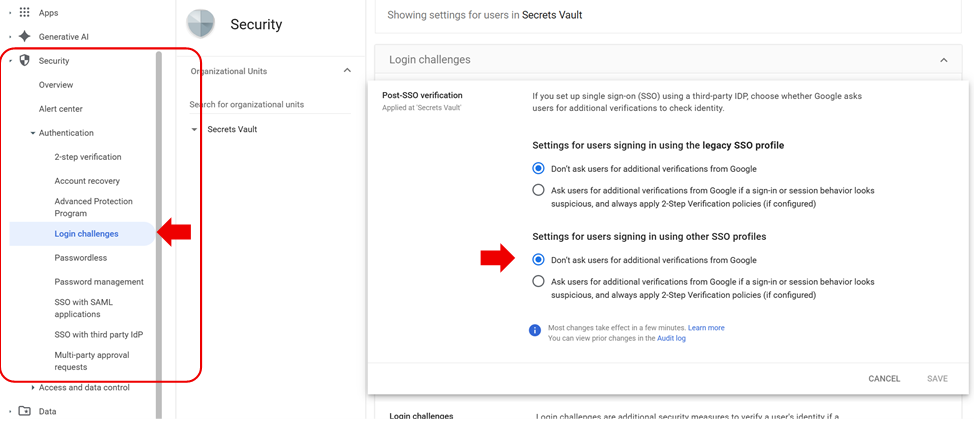
In Security → Authentication → Login challenges, check that additional verifications are disabled (“Don’t ask users for additional verifications from Google”) under Settings for users signing in using other SSO profiles.
5.2 Test
Test the sign-in with a user from the assigned group in a fresh browser session: start from a Google service, confirm redirection to Secrets Vault Identity, complete visual authentication, and verify that Google opens the expected account. Check a failed sign-in, an email mismatch, and the recovery administrator’s direct Google sign-in. If any check fails, remove the group’s SSO assignment until the issue is resolved.