Microsoft Entra ID
User Provisioning via SCIM (Entra ID)
1. Introduction
This section covers how to set up Entra ID for provisioning user accounts to an external IdP compliant with the SCIM 2.0 protocol.
Reference documentation:
- Overview of SCIM sync: https://learn.microsoft.com/en-us/entra/architecture/sync-scim
- Develop and plan SCIM provisioning with Entra ID: Tutorial - Develop a SCIM endpoint for user provisioning to apps from Microsoft Entra ID
- Integrate SCIM endpoint with Entra ID: https://learn.microsoft.com/en-us/entra/identity/app-provisioning/use-scim-to-provision-users-and-groups#integrate-your-scim-endpoint-with-the-azure-ad-provisioning-service
- Testing SCIM integration with Entra ID: https://learn.microsoft.com/en-us/entra/identity/app-provisioning/scim-validator-tutorial
- EntraID SCIM integration testing service: https://scimvalidator.microsoft.com/
2. Setting up Visual Passcodes
Before setting up the SCIM synchronization service in EntraID, it is necessary to set up an access API key and gather SCIM endpoint information from the Visual Passcodes tenant. Both will be needed in EntraID.
2.1 Create SCIM access token
The API uses Bearer Token authentication. An API token must be created and included in the Authorization header of every request.
To create the API token:
-
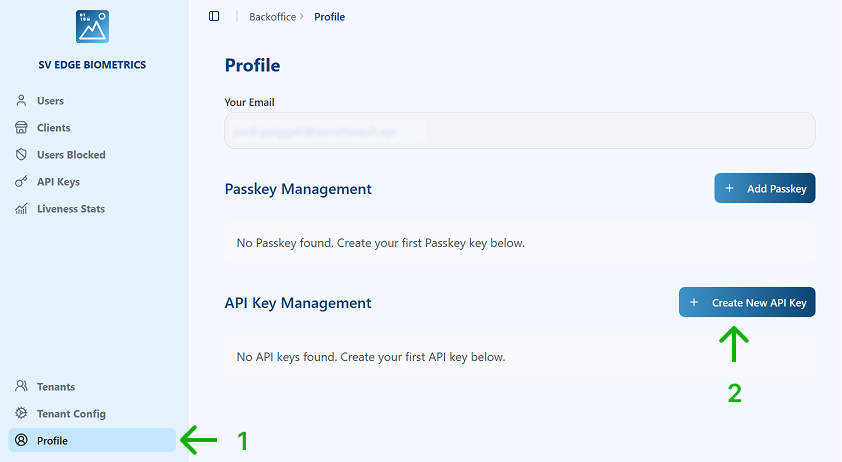
Go to the Profile.
-
Click on Create New API Key.
-
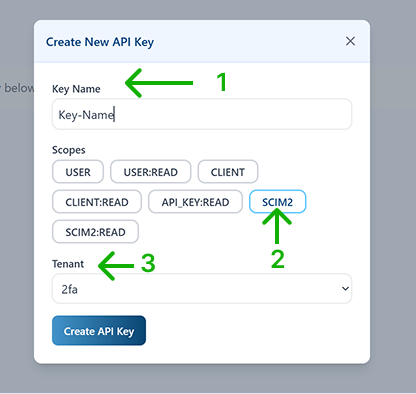
Specify:
-
Key Name
-
Scope:
SCIM2— to allow EntraID to make changes in the identity provider. -
Tenant: choose from the dropdown the Tenant where the API key applies to.
-
Click on Create API Key.
-
-
Copy the API Key value using the Copy icon.
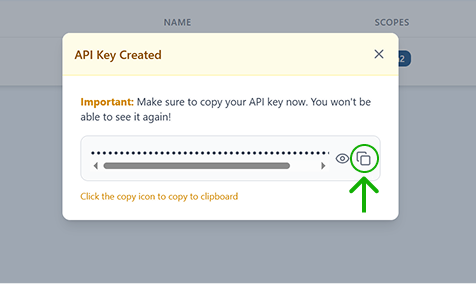
It is important to keep this value in a secure place until used when configuring the EntraID SCIM synchronization service, since the value cannot be retrieved again once the window is closed.
2.2 Identify SCIM Endpoint
To identify the SCIM endpoint:
-
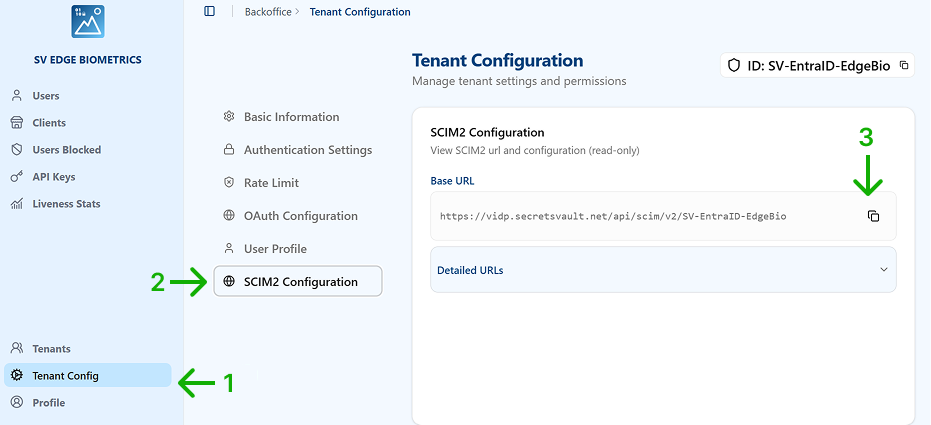
Select Tenant Config in the main menu.
-
Select SCIM2 Configuration in the submenu.
-
Copy the SCIM2 Base URL using the copy icon. Keep it for the Entra ID configuration.
3. Setting up Entra ID
Based on reference 3.
3.1 Create Application
-
Sign in to the Microsoft Entra admin center as at least an Application Administrator.
-
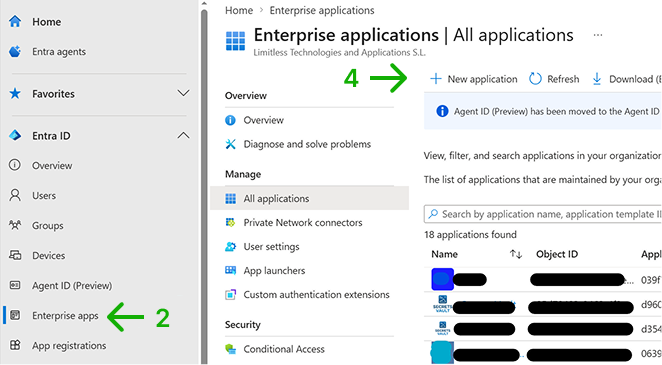
Browse to Entra ID > Enterprise apps.
-
A list of all configured apps is shown, including apps that were added from the gallery.
-
Select + New application.
-
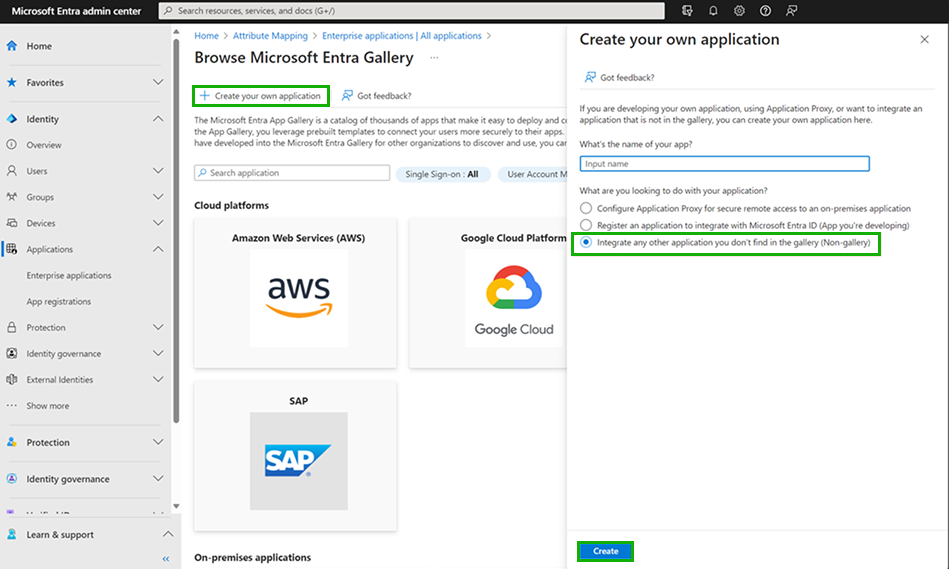
In the new window, select Create your own application.
-
In the Create your own application panel, enter a name for your application, choose the option "integrate any other application you don't find in the gallery", and select Add. The new app is added to the list of enterprise applications and opens to its app management screen.
3.2 Configure Application
-
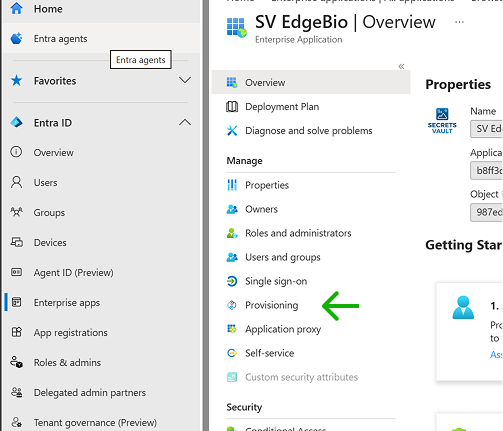
In the app management screen of the newly created application, select Provisioning in the left panel.
-
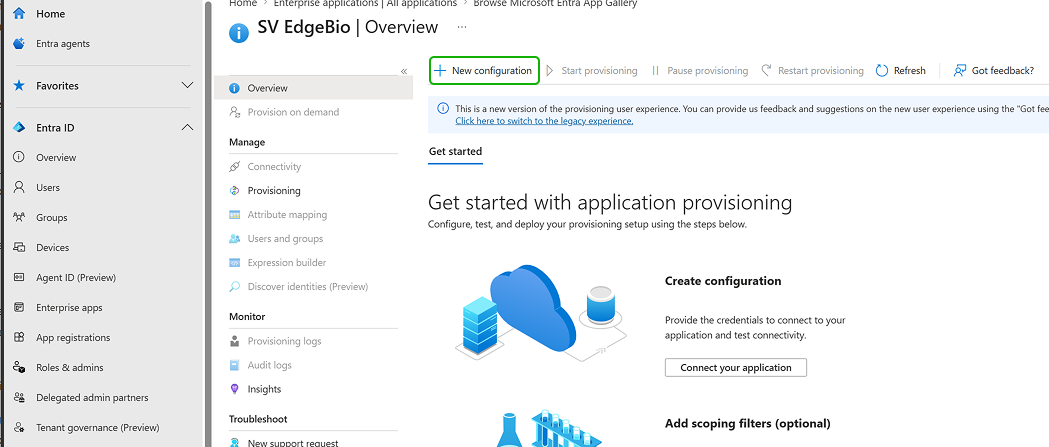
Select + New configuration.
-
In the New provisioning configuration page:
- Select authentication method as Bearer authentication.
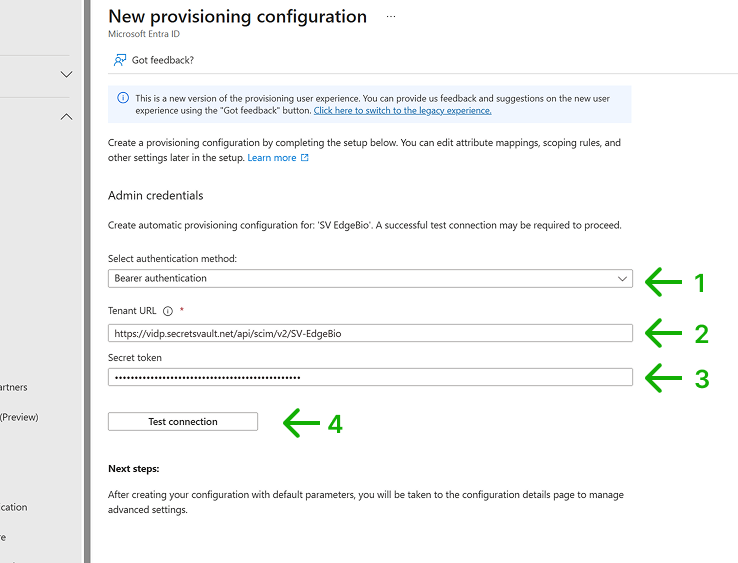 2. Specify as the Tenant URL the Base URL of the Visual Passcodes Tenant SCIM endpoint (see section 2.2 Identify SCIM Endpoint). 3. Specify as the Secret token the API Key value generated in the Visual Passcodes Tenant (see section 2.1 Create SCIM access token). 4. Select Test Connection to have Microsoft Entra ID attempt to connect to the SCIM endpoint. If the attempt fails, error information is displayed.
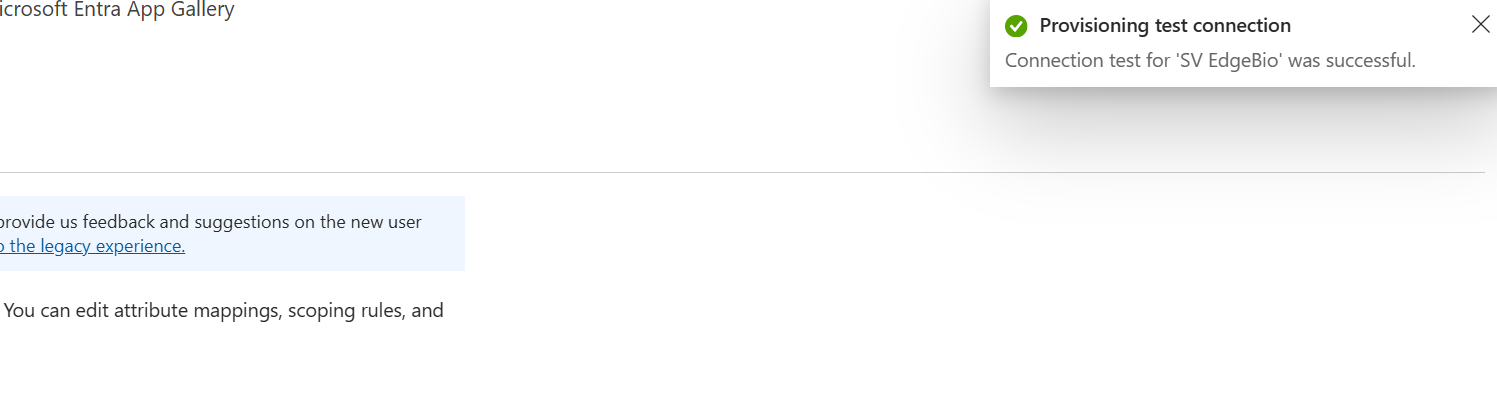
-
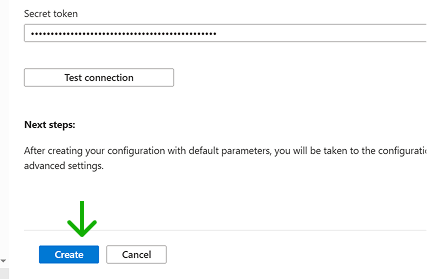
If the test is successful, the Create button is enabled. Click on it.
3.3 Configure Sync Data
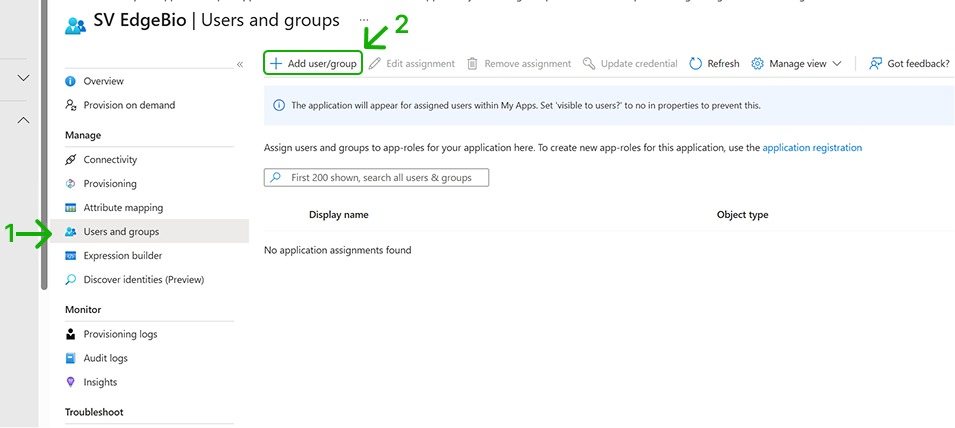
By default, no user/group data is in sync. You need to specify them:
-
Select the Users and groups option from the menu. By default no users/groups are listed.
-
Click on Add user/group to add them.
-
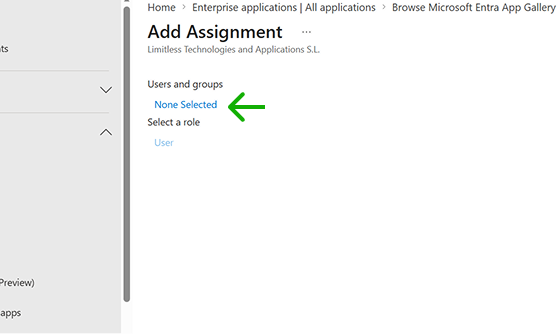
In the Add Assignment screen, click on None Selected to add users and groups.
-
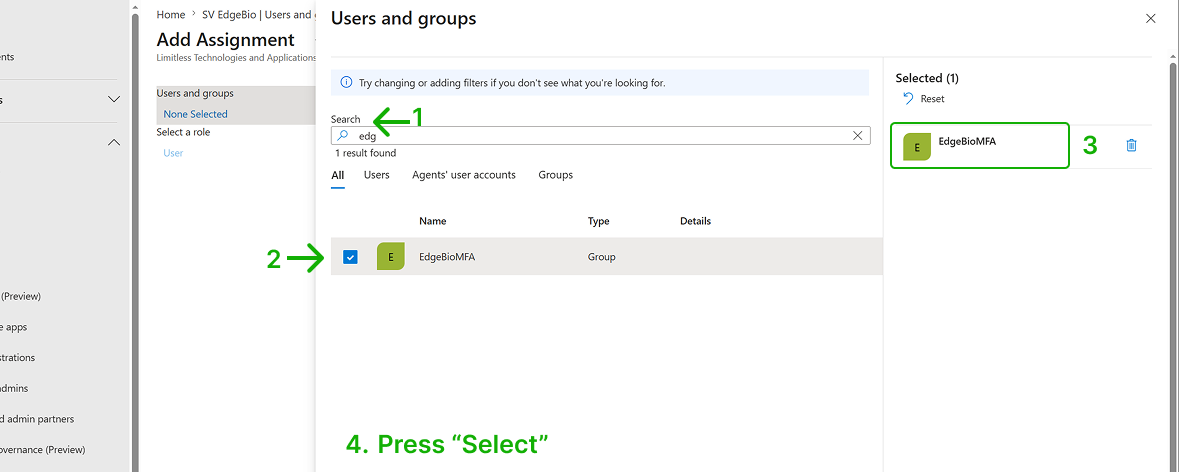
In the users and groups page, select the users or groups you want to sync (use the search function to facilitate it) and click Select.
-
In the Add Assignment page, select Assign.

-
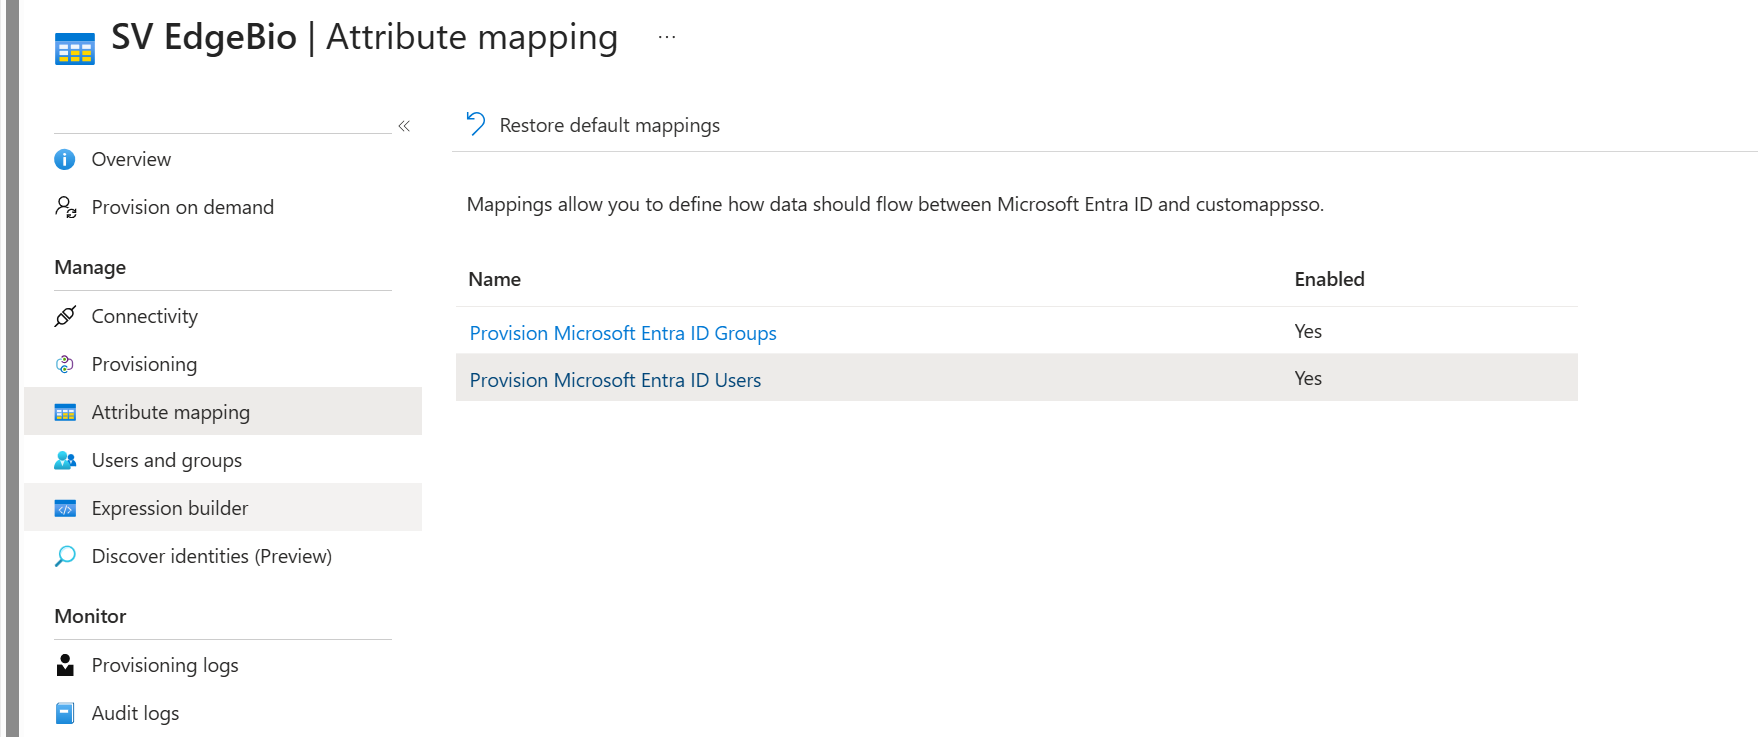
If you want to limit the user or group information synced with Visual Passcodes, you can select which fields are synced in the Attribute mapping menu option.
- There you can select Entra ID Groups or Entra ID Users attributes.
 2. When selecting any option, you will see the list of attributes and choose which ones to sync by removing the unwanted ones. Changes are not applied until Save is selected. Discard allows you to leave without applying changes.
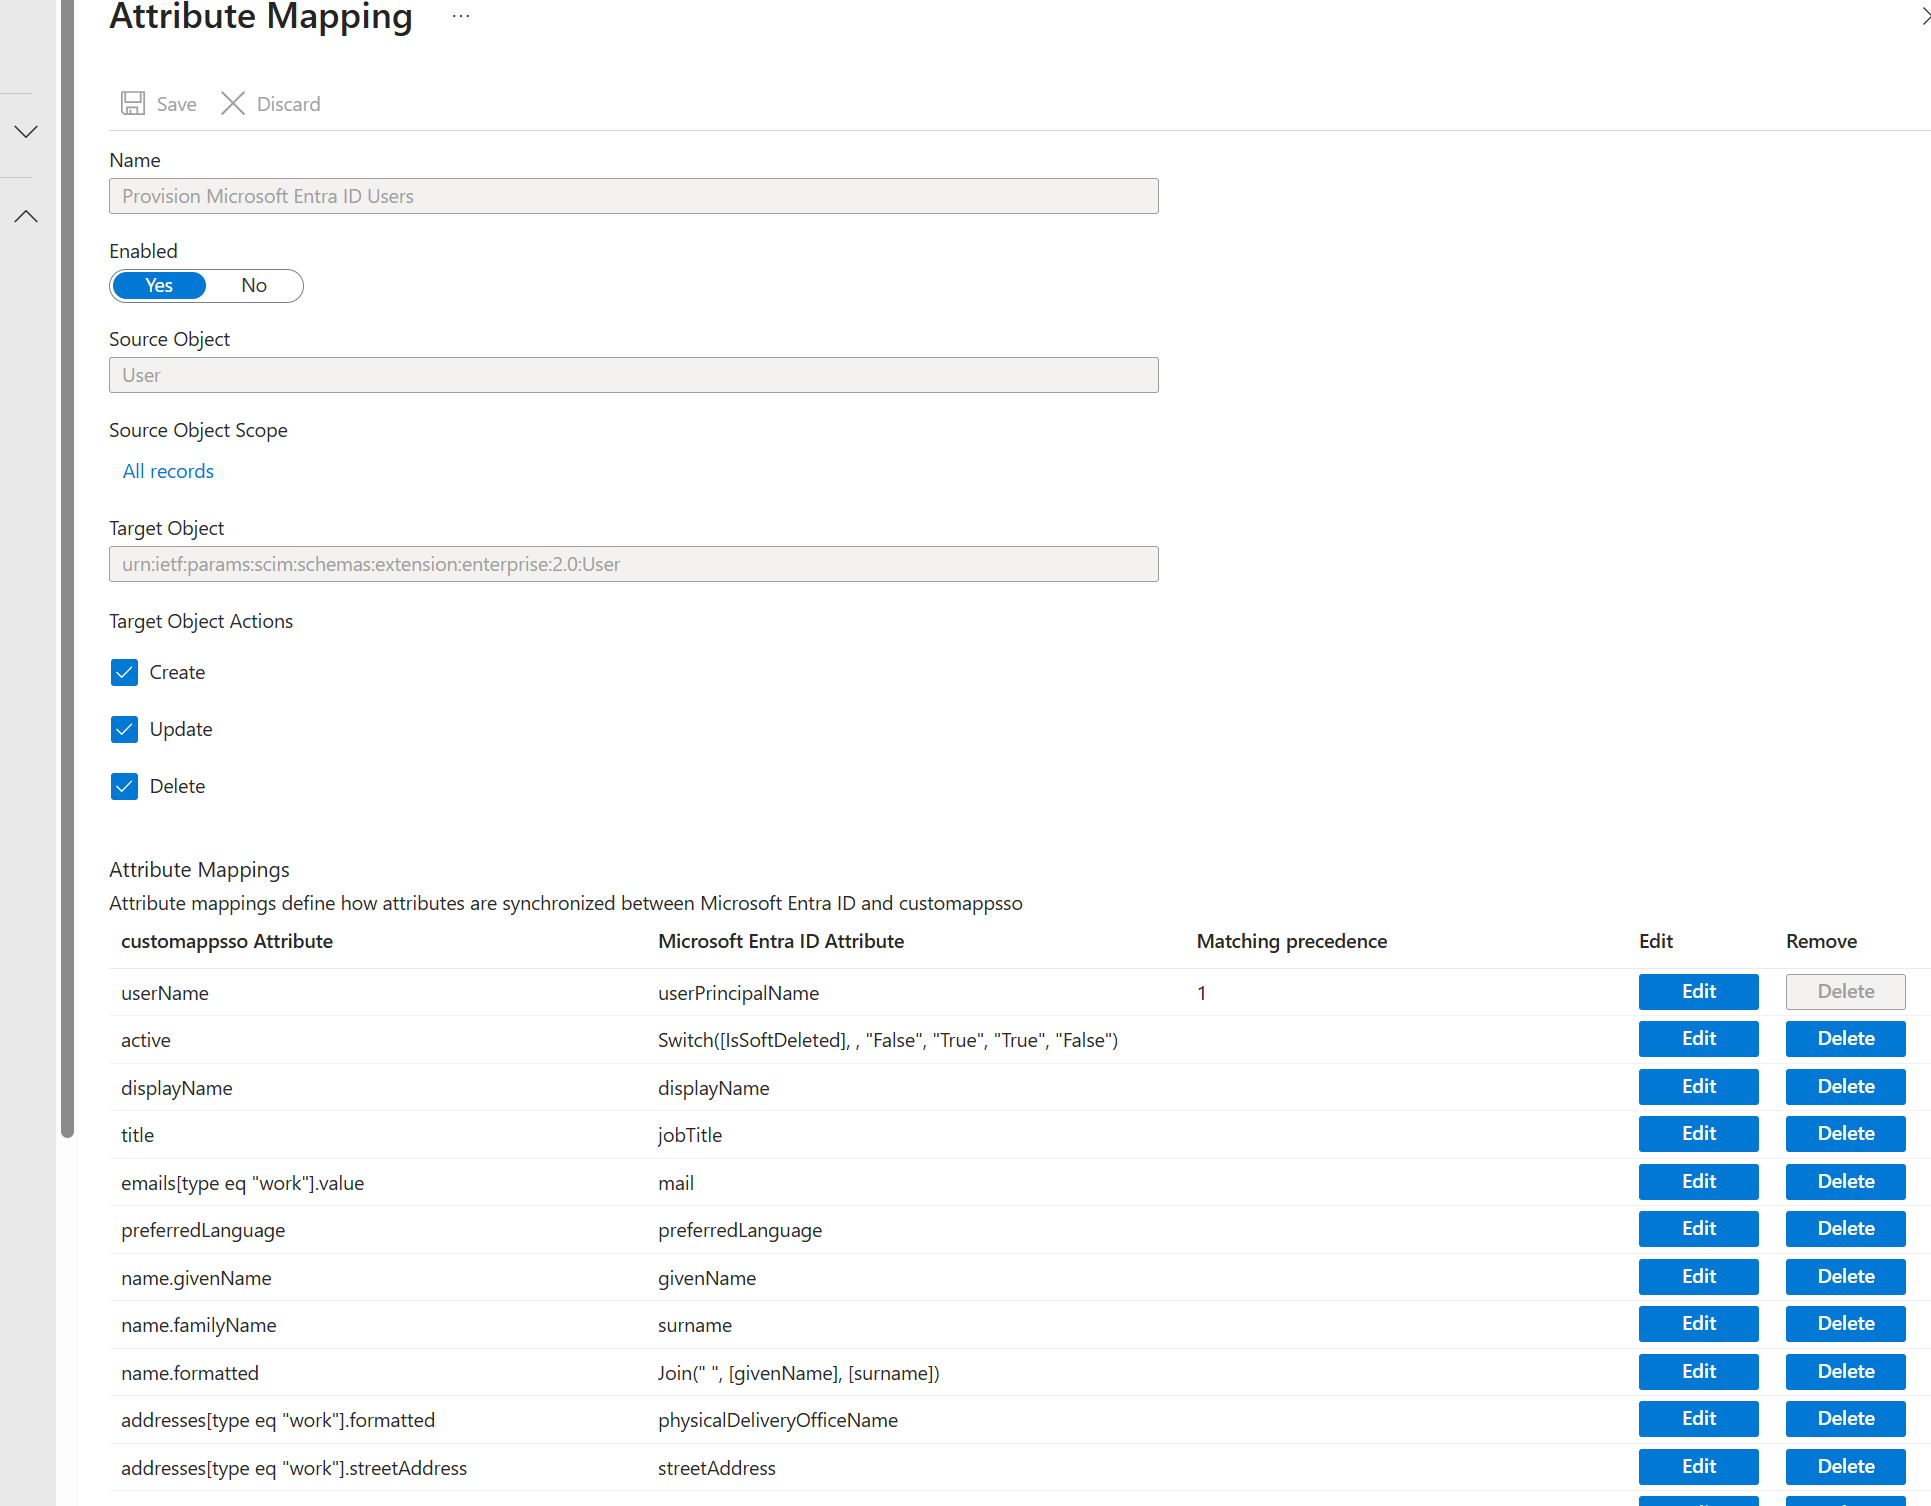
-
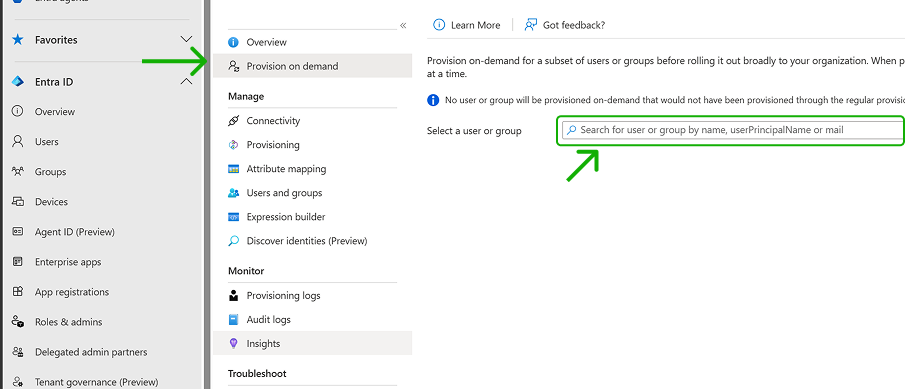
For testing if sync is working, select Provision on-demand in the left panel. Search for a user that is in scope for provisioning and provision them on-demand. Repeat with other users that you would like to test provisioning with.
-
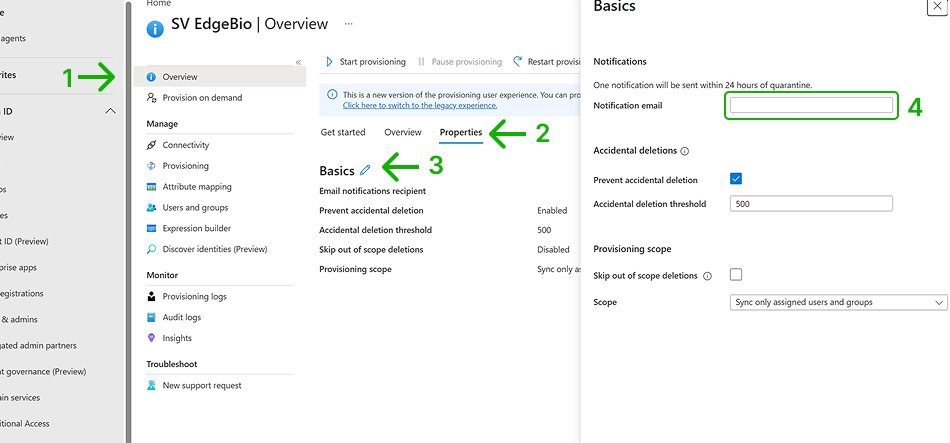
Once your configuration is complete, select Overview in the left panel.
- Select Properties.
- Click the pencil icon to edit the properties. Enable notification emails and provide an email to receive quarantine emails. Enable accidental deletions prevention. Click Apply to save the changes.
-
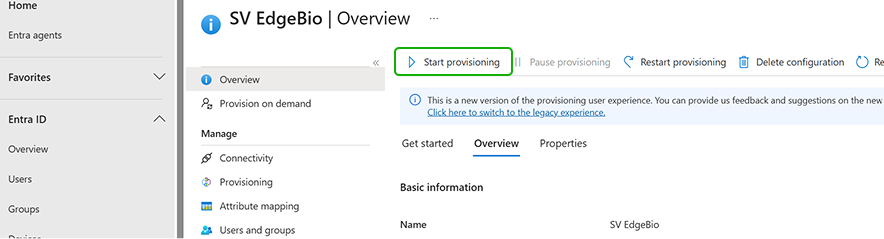
Select Start provisioning to start the Microsoft Entra provisioning service.
-
Once the initial cycle has started, you can select Provisioning logs in the left panel to monitor progress, which shows all actions done by the provisioning service on your app.